Customising Your TreeAMS Site
TreeAMS allows you to customise your TreeAMS site so that everyone in your team and franchisee teams knows it is your brand and feels welcome!
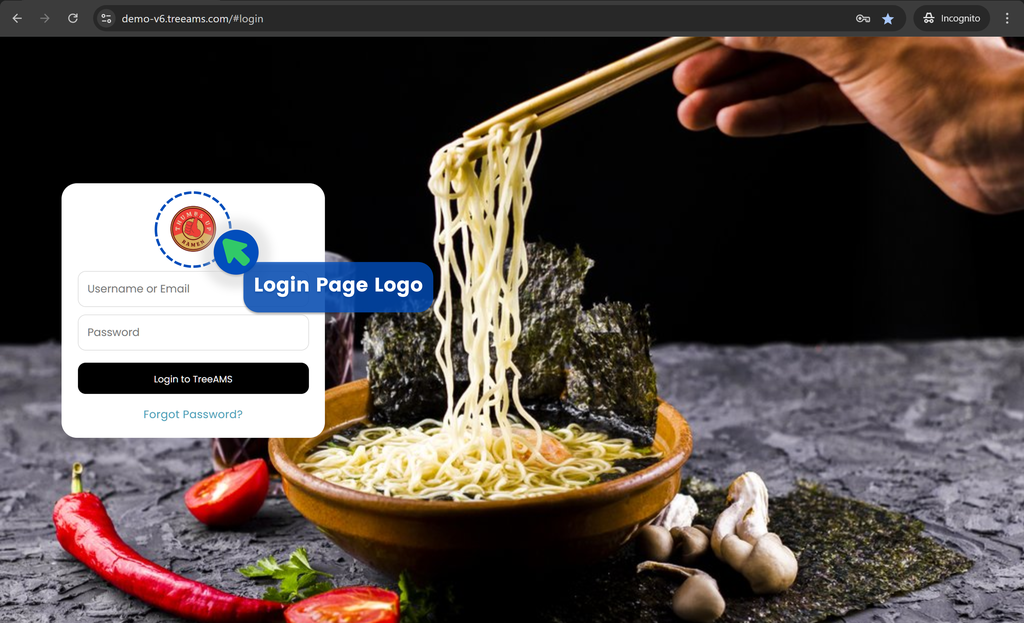
There are a few things you can customise on TreeAMS:1. Login Page Logo
- Go to Desk. Learn how you can switch to Desk here!
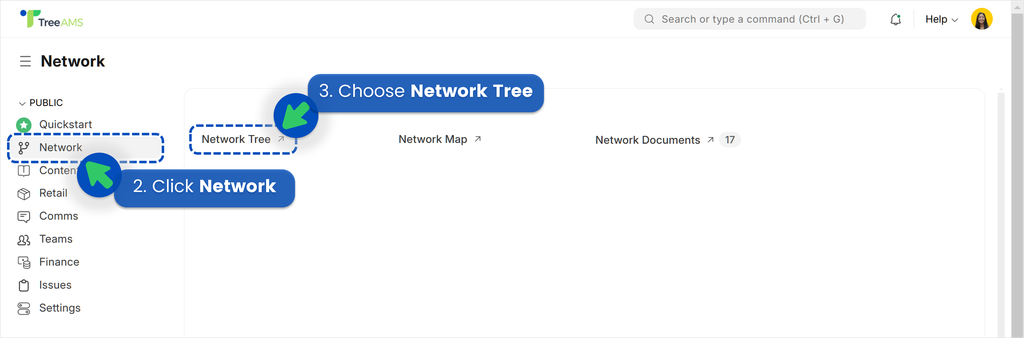
- Click Network
- Choose Network Tree
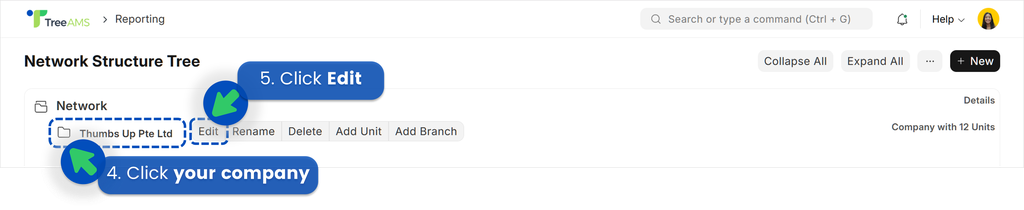
- Click your company name
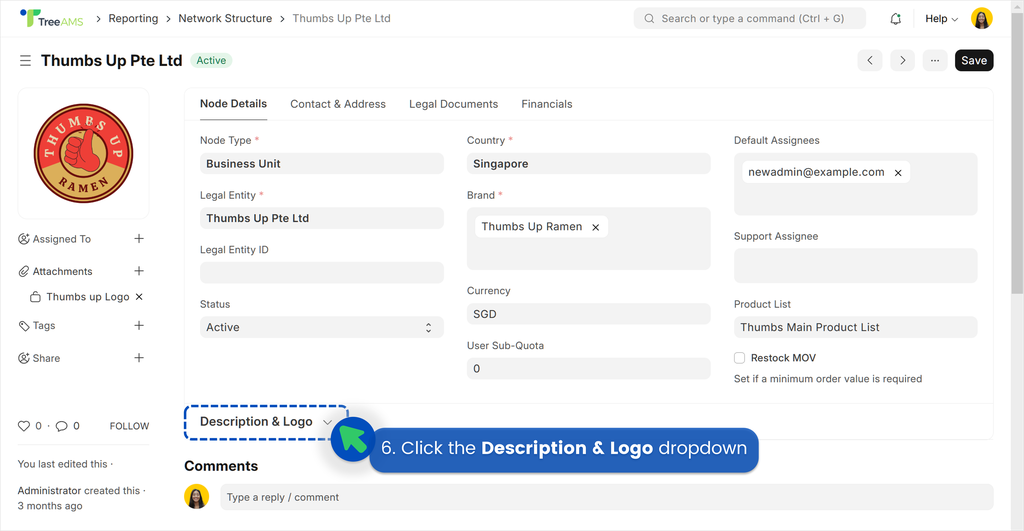
- Click Edit
- On your company details page, find and click the Description & Logo dropdown
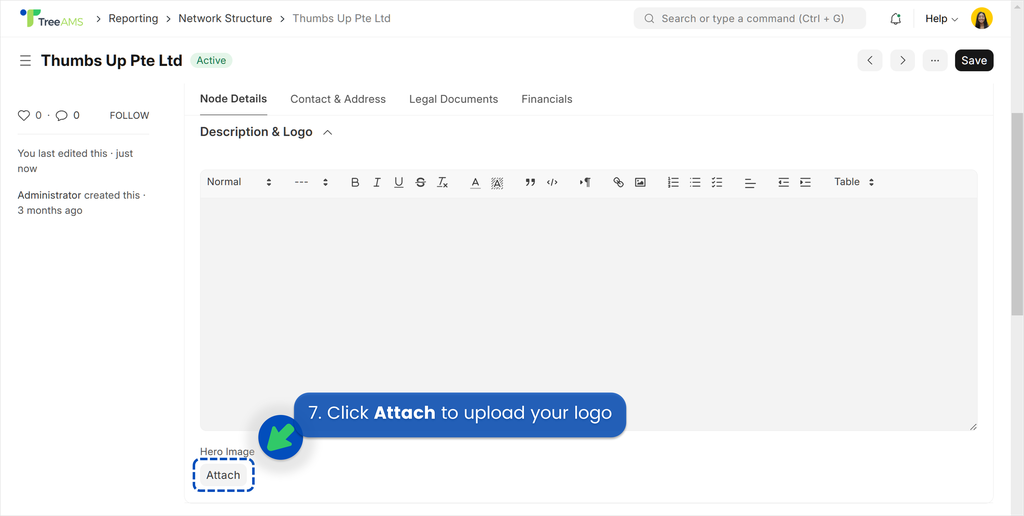
- Find "Hero Image" on the bottom and click Attach to upload your logo!
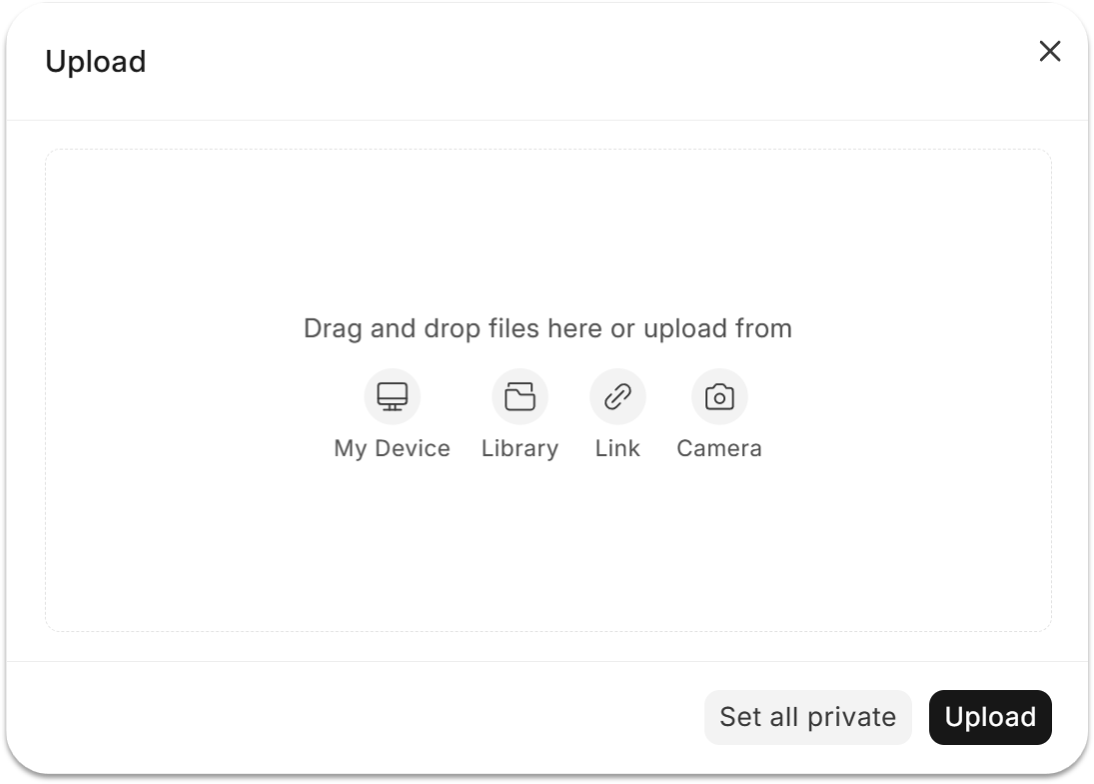
- Upload your login page logo
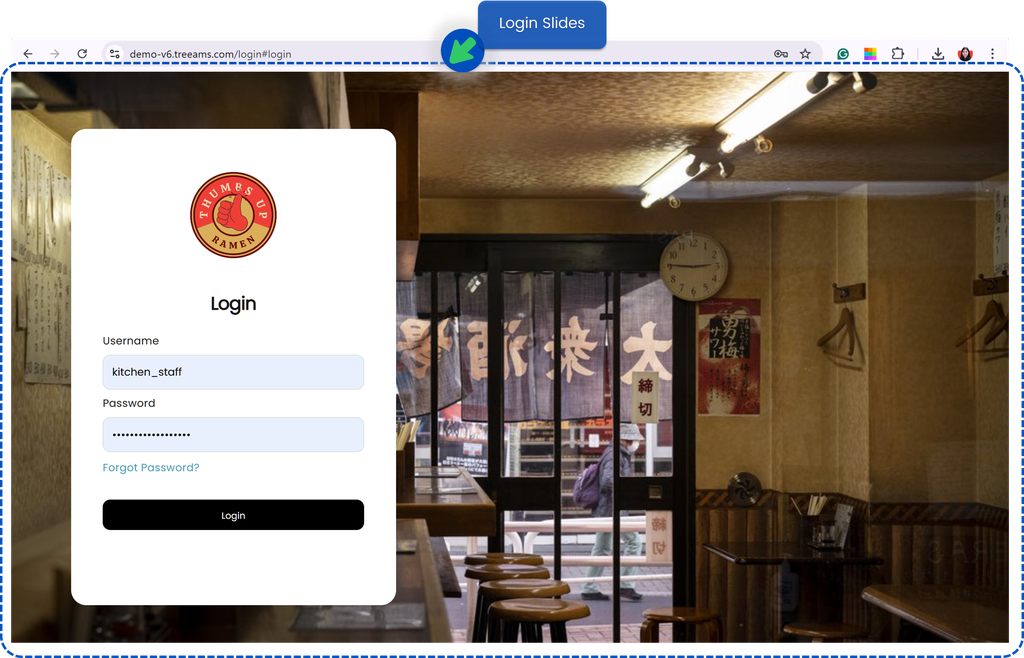
- IMPORTANT! Before you click the Upload button, please make sure that your login page logo is made public! Remember: your login page logo will appear on the login page where users have not logged in to TreeAMS. Therefore, you have to make it public. You can do this by either:
- Untick the Private checkbox; or
- Click Set all public
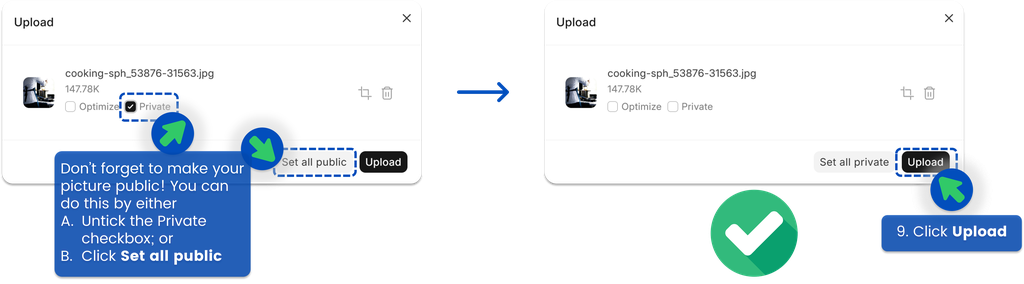
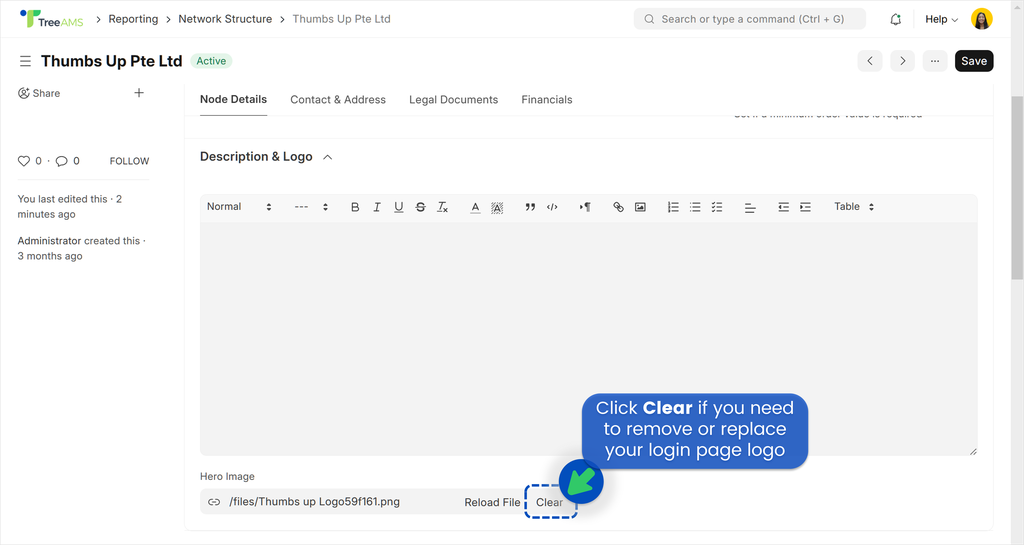
- You're all set! If you need to remove your login page logo, simply click Clear and you may reupload your login page logo again
2. Login Slides
- Go to Desk. Learn how you can switch to Desk here!
- Select Settings
- Click Login Slides
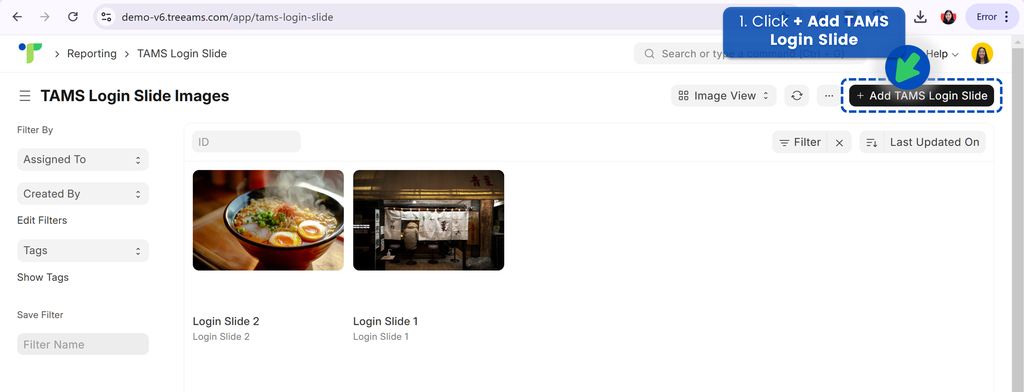
2.1 Adding a New Login Slide
- Click + Add TAMS Login Slide
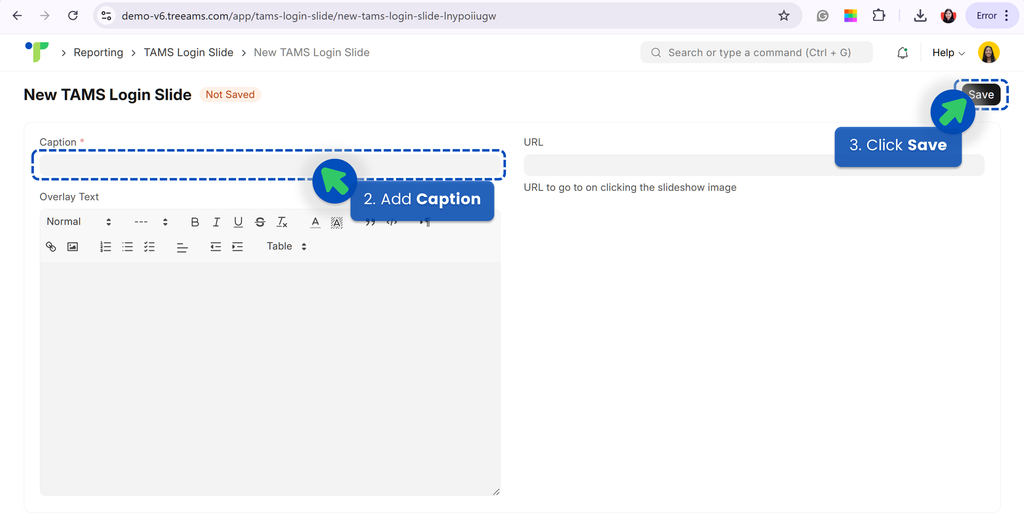
- Add Caption! This will be your login slide's name. Example: Login Slide 1
- Click Save
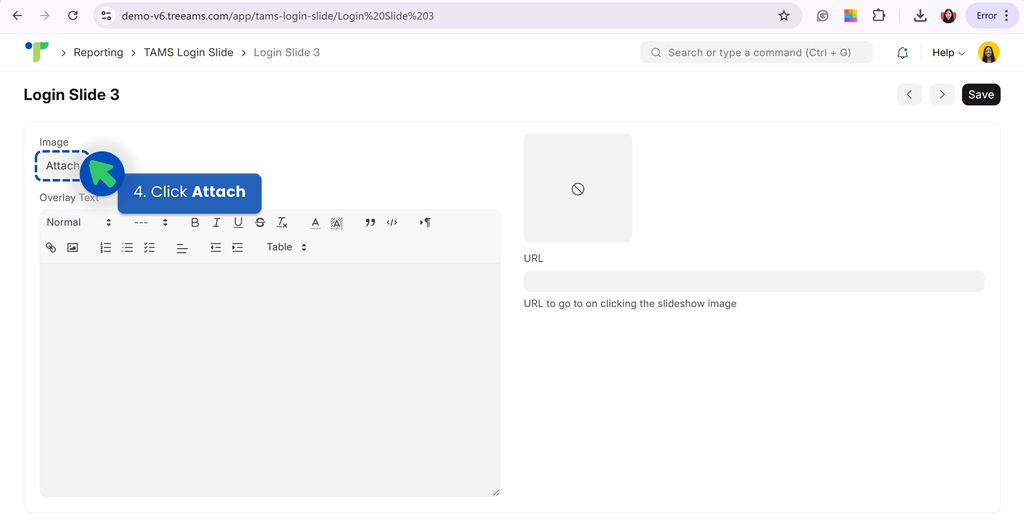
- Click Attach!
- Upload your login slide image. Do note that you can only attach one image in one upload.
- Click Upload Tips: if you need to replace the picture, simply click Clear and upload the picture again.
- You're all set! If you need to upload more pictures, repeat all steps in 2.1 Adding a New Login Slide
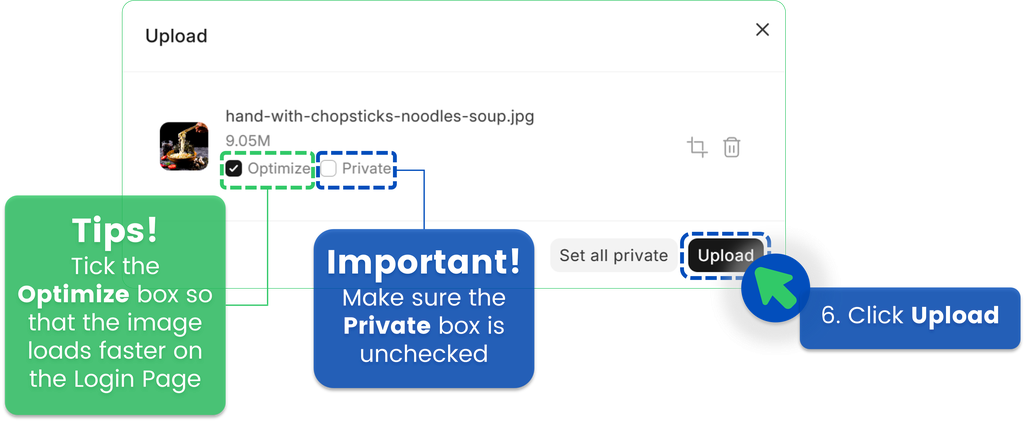 Optimize refers to reducing the image size and quality so that it loads faster.
2.2 Removing a New Login Slide
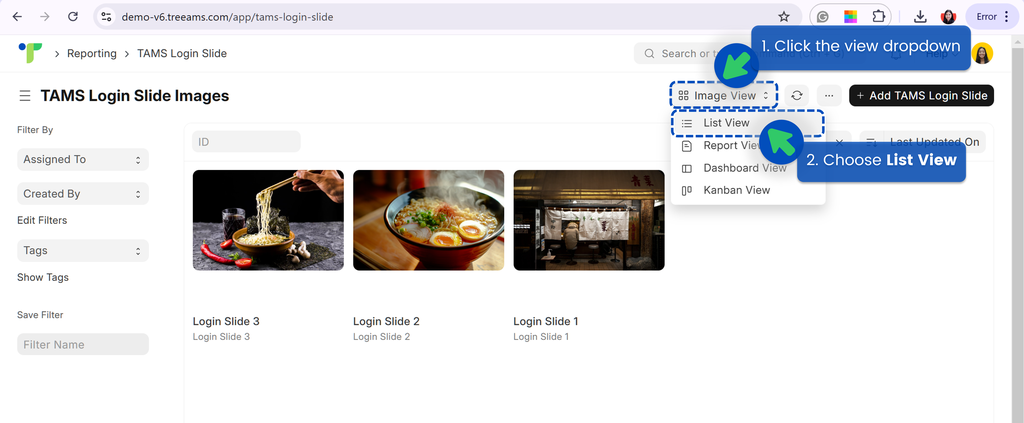
- From the TAMS Login Slides page, click the view dropdown
- Choose List View
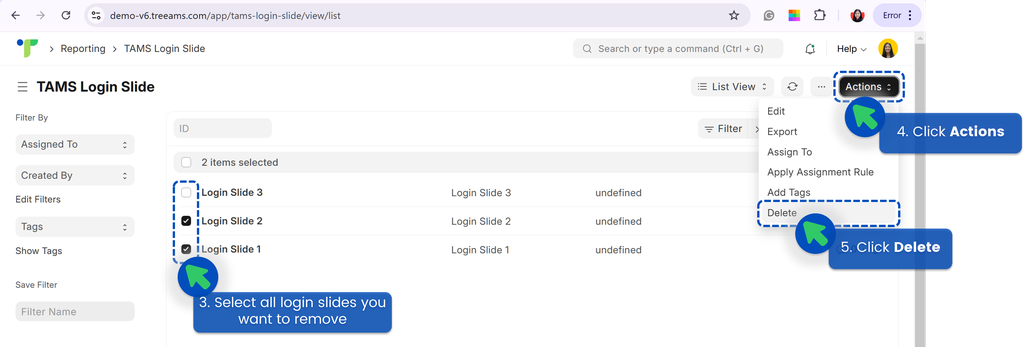
- Select all login slides you want to remove
- Click Actions
- Click Delete
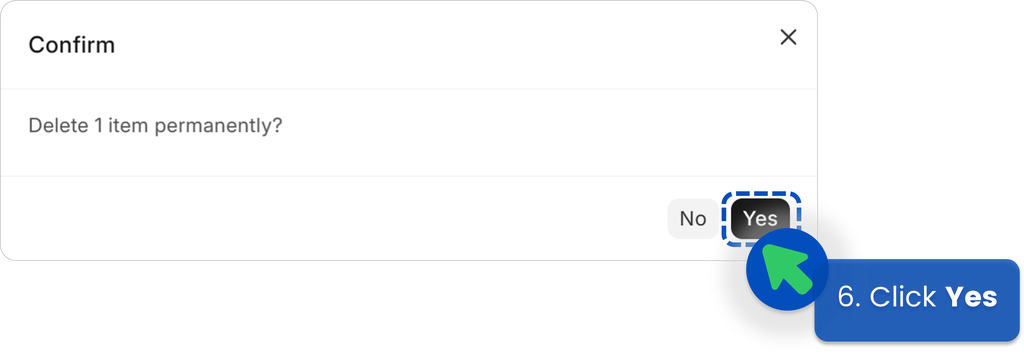
- Click Yes! Your login slide(s) has been removed!
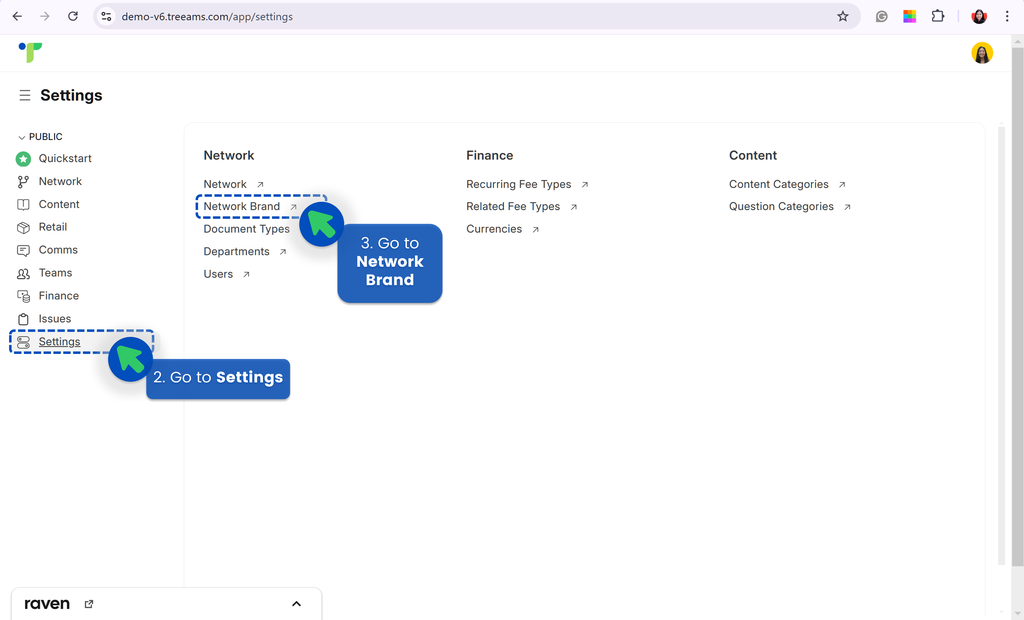
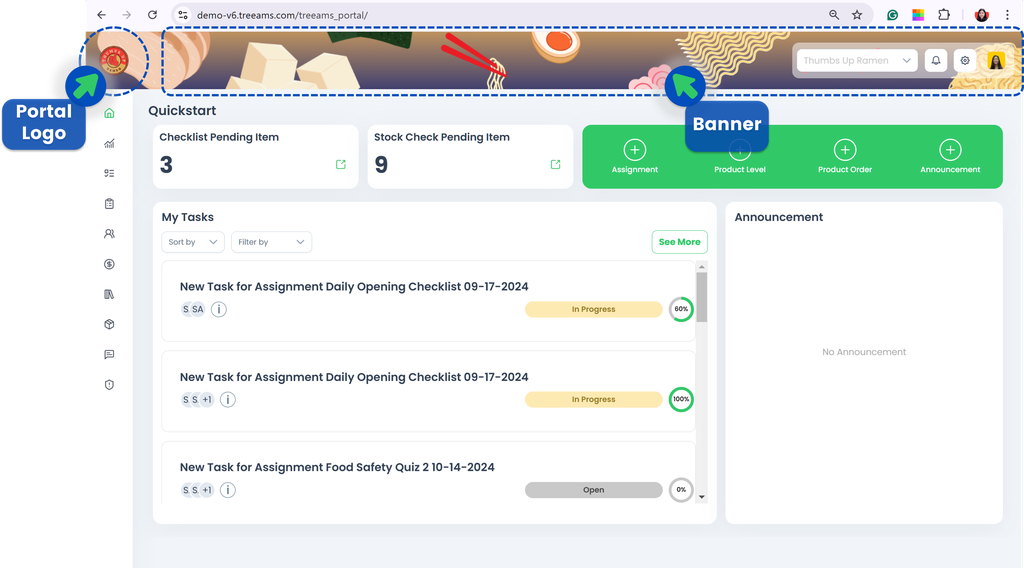
3. Banner & Portal Logo
- Go to Desk. Learn how you can switch to Desk here!
- Select Settings
- Click Network Brand
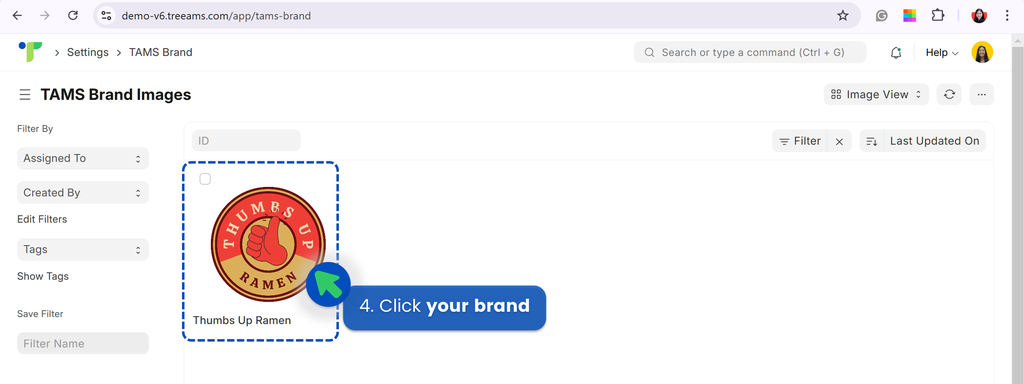
- Click your brand. Do note that if you are new to TreeAMS, you will only be seeing your brand initial. For example, if the brand name is Thumbs Up, then the initial will be "TU"
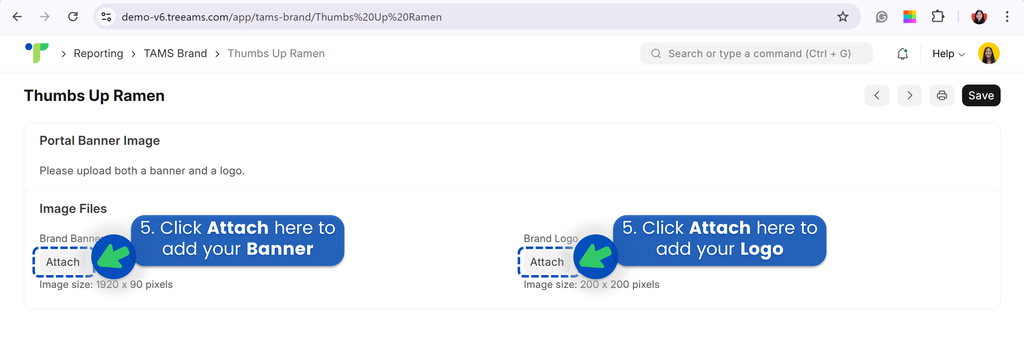
- To add your banner or portal logo, click Attach
- Upload your banner or portal logo! For best results, please make sure that your:
- banner dimension is at least 1920 x 90 pixels (landscape)
- portal logo dimension is at least 200 x 200 pixels
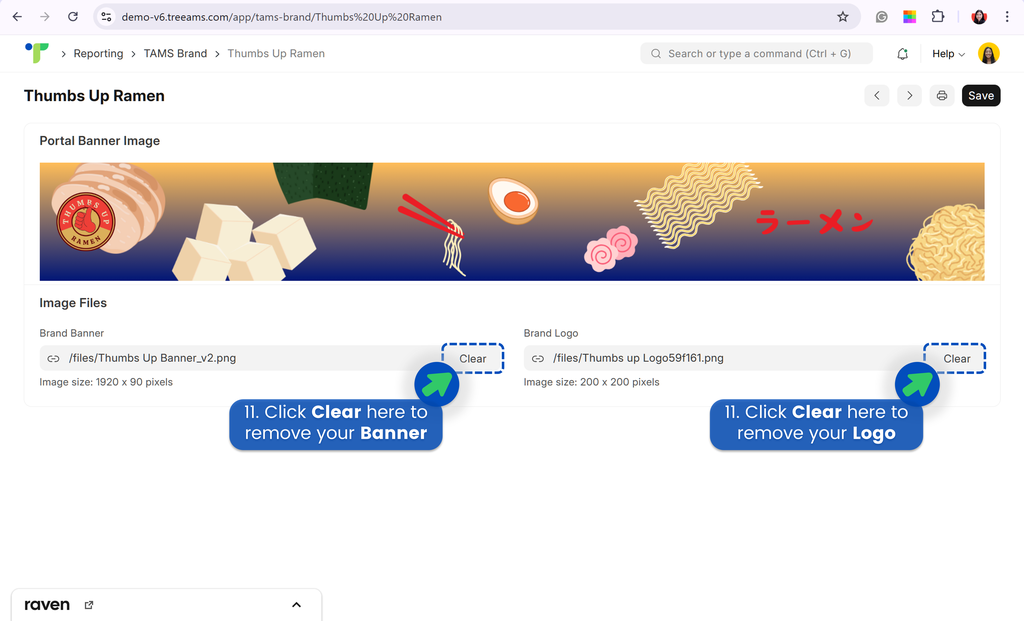
Also, you don't need to worry about the file size as you have the option to Optimize any images you upload on TreeAMS, including your Banner and Logo. Optimization refers to reducing the logo size and quality so that it loads faster! - Click Upload!
- Your banner or portal logo is now uploaded! Please note that TreeAMS automatically saves the progress when you upload a picture so it saves you some time from clicking the save button!
- You're all set! Go to Portal to see the results! Learn how you can switch to Portal here!
- If you need to change or remove your portal logo or banner, simply click the Clear button and repeat the above steps to upload your banner and portal logo again