Setting Up Teams
This section covers:
- What is the Teams feature in TreeAMS?
- Creating a Team
- Setting Up a Default Team
- Creating a Department
What is the Teams feature in TreeAMS?
Teams is a powerful feature in TreeAMS that helps you organise your people by function, location, and responsibility — so you can collaborate more effectively and get things done faster.
With Teams, you can:
- Group users based on their departments and/or duties
- Streamline task assignment and accountability
- Manage permissions and visibility more easily
Creating a Team
To create a team, your role must be either a Site Admin or a Site User with the TreeAMS Teams Manager sub-role. For more details on the different roles in TreeAMS, refer to User Types. If you're unsure of your role, please check with your manager or administrator.
Here is How to Create a New Team in TreeAMS:
- Go to Desk. Learn how you can switch to Desk here!
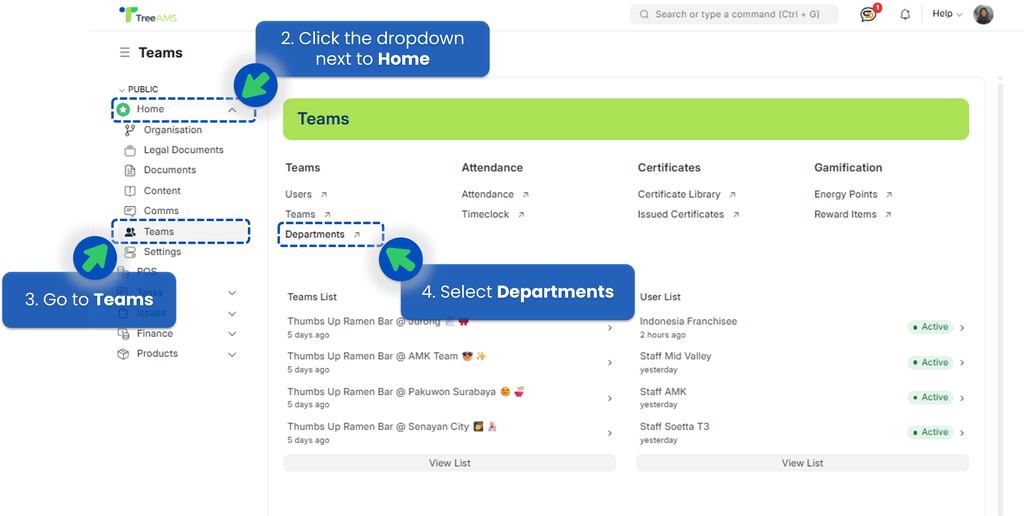
- Click the dropdown next to Home menu.
- Go to Teams menu.
- Select Teams.
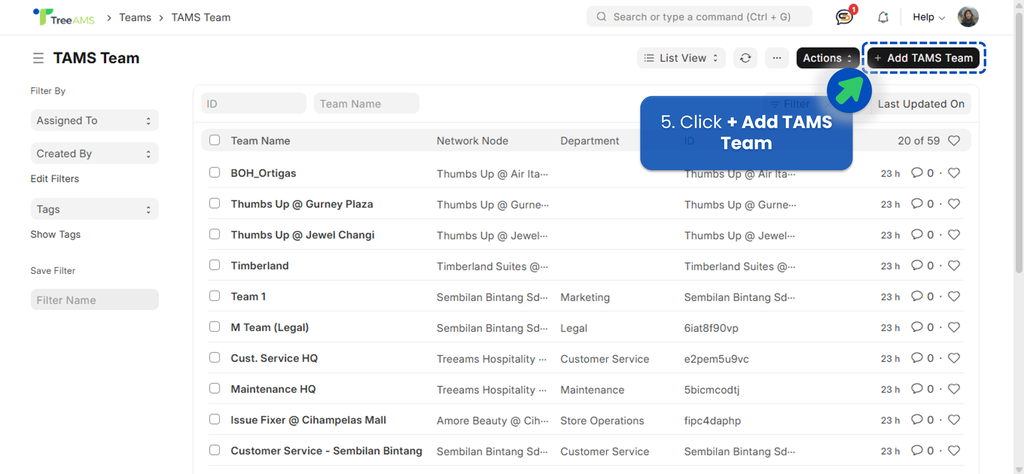
- On the Teams page, click +Add TAMS Team.
- Start filling in or updating the details:
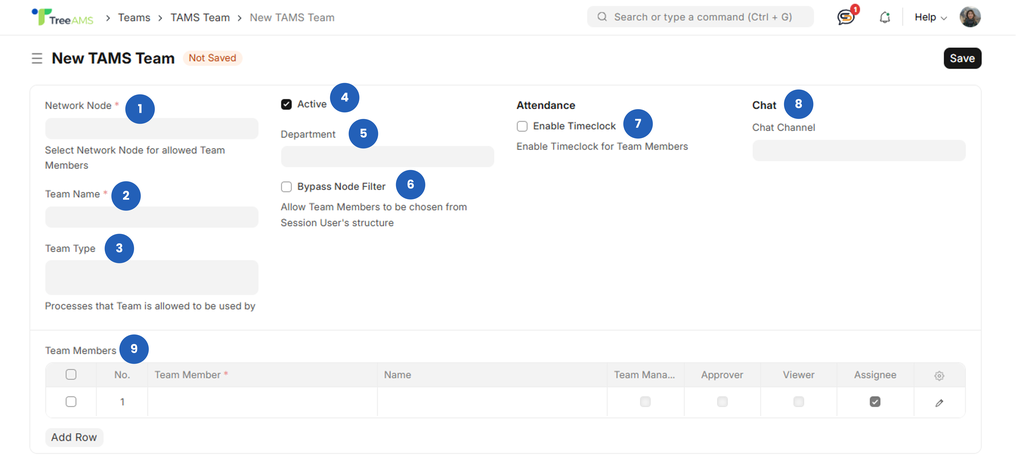
- Network Node: Choose the node / location for this team. If the team will handle tasks such as checklists, audits, training, and workflow, make sure to select a Unit-level location (not Branch-level) because it affects data in Insight.
- Team Name: Key in your team’s name. Examples include “The Best Team,” “Ops @ ION Orchard,” and more.
- Team Type: Choose the capabilities this team will have. There are four options:
- Assignments 👉 the team can be assigned to tasks or responsibilities.
- Chats 👉 the team can have its own channel or chat room.
- Issues 👉 the team can be assigned as an Issue Fixer — responsible for resolving reported issues.
- Documents 👉 the team can receive notifications about document expiration.
- Finance 👉 the team can create a monthly finance entry.
- Active checkbox: Leave this checked to keep the team active. Uncheck it if you want to deactivate the team.
- Department: Select the department if applicable.
- Bypass Node Filter: Also known as Allow Parent Node.
- When enabled 👉 the system can invite users from higher network levels.
- When disabled 👉 only users with permissions under the selected Network Node can be added to this team.
💡 Why including team members from HQ/Parent Branch is important:
This allows HQ or Parent Branch users—such as Auditors, Trainers, and Operations Managers—to assign tasks and gain visibility into the store’s performance. - Enable Timeclock: Turn this on if this team will be the one allowed to clock in/out. Note: Only one team can have timeclock capability.
- Chat: This field will auto-fill if you selected Chat as a Team Type and saved the team.
- Team Members: Add users to the team by:
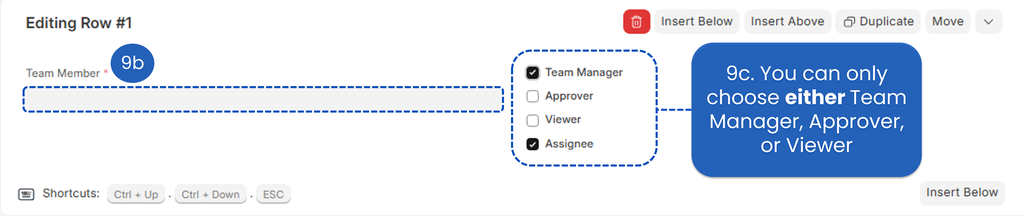
- Click Add Row button, then click the pencil icon on the right side to edit the new row.
- Team Member: Insert Email/username of the user you want to add.
- Assign at least one role to each team member. Refer to the illustration below for more details on each role.
📌 Note: For these 3 roles, you can only choose one either: Team Manager, Approver, or Viewer.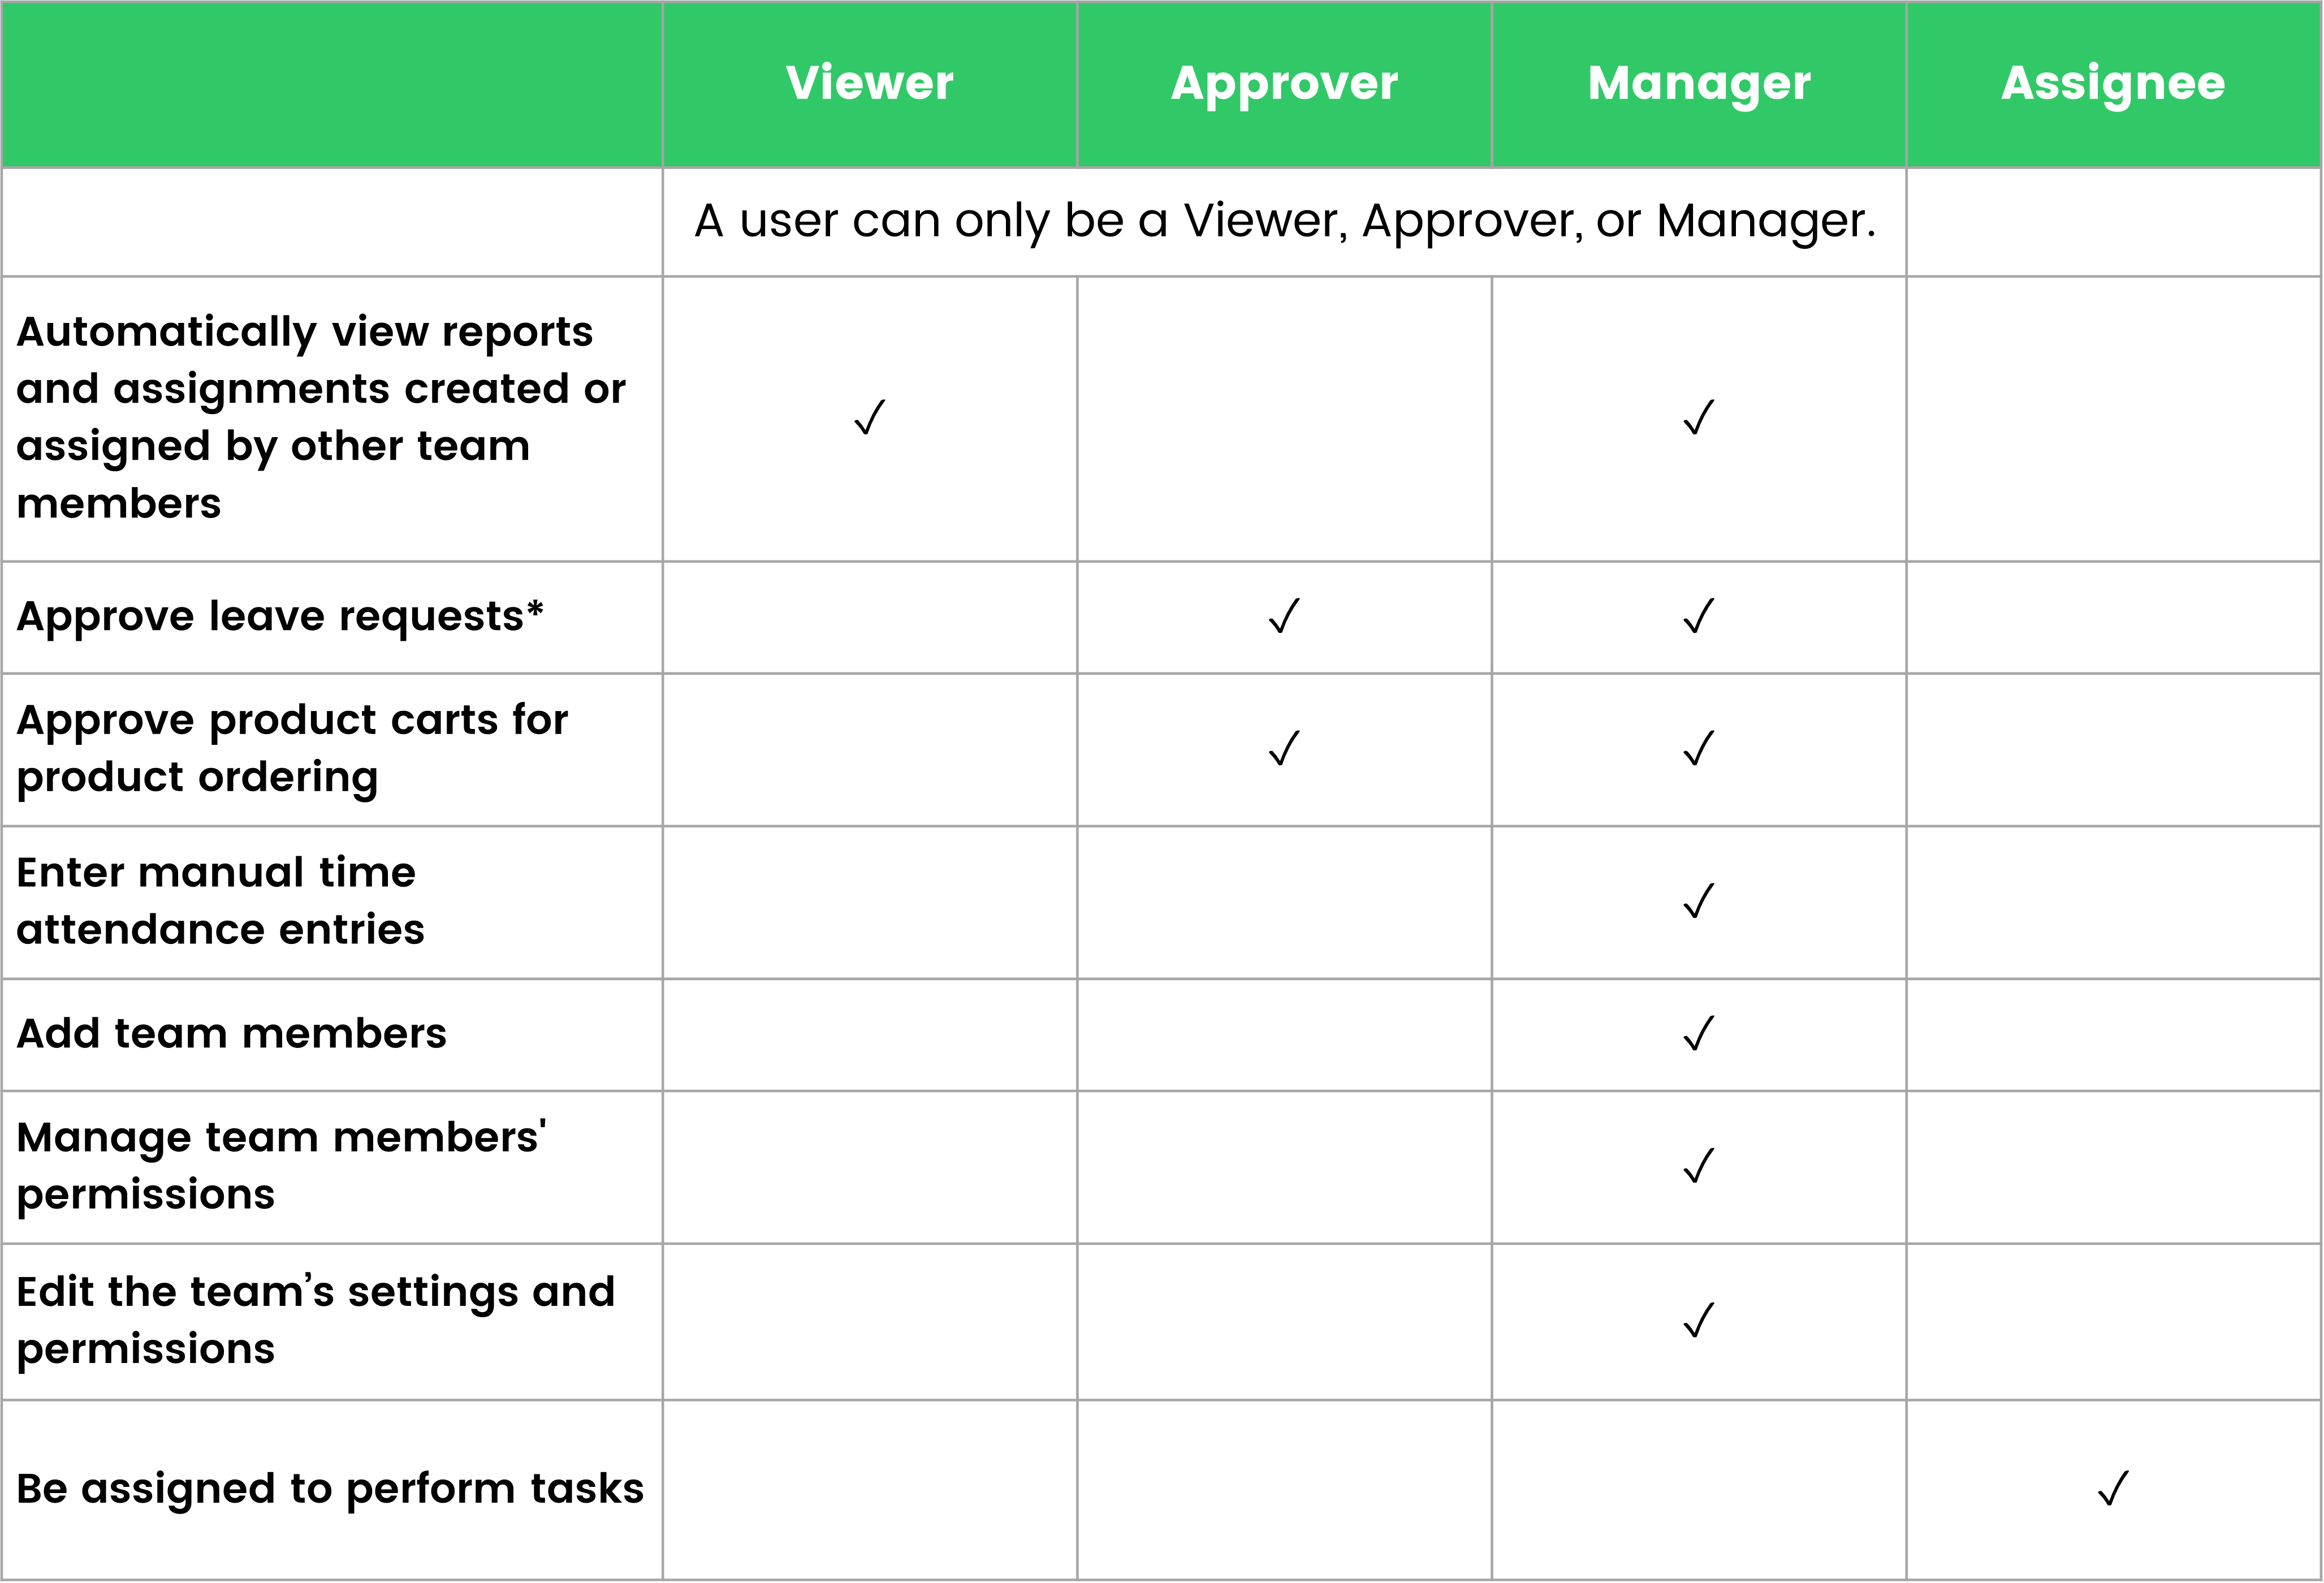 * Coming soon
🚨 Each team must have at least:
• 1 Assignee – required to receive and complete tasks (checklists, training, etc.).
• 1 Manager – responsible for managing the team, viewing insights, and, ifChatis enabled, serving as the team’s chat admin. - Finally, click Save!

Setting Up a Default Team
A Default Team in TreeAMS is a team that is automatically available for certain actions across the platform. It does not mean that tasks are assigned automatically, but rather that the team is pre-selected as an option for various purposes.
Default Team can be used for:Having a Default Team ensures that these roles are consistently available across different modules, making workflows smoother and reducing the need to manually select teams each time.
- Assignments: Available as assignees, reviewers, or acknowledgees.
- Product Level & Cart: Can act as approvers or receivers of product transfers.
- Issue Tracker & Asset Management: Can serve as issue fixers.
Here's how you can set up a default team:
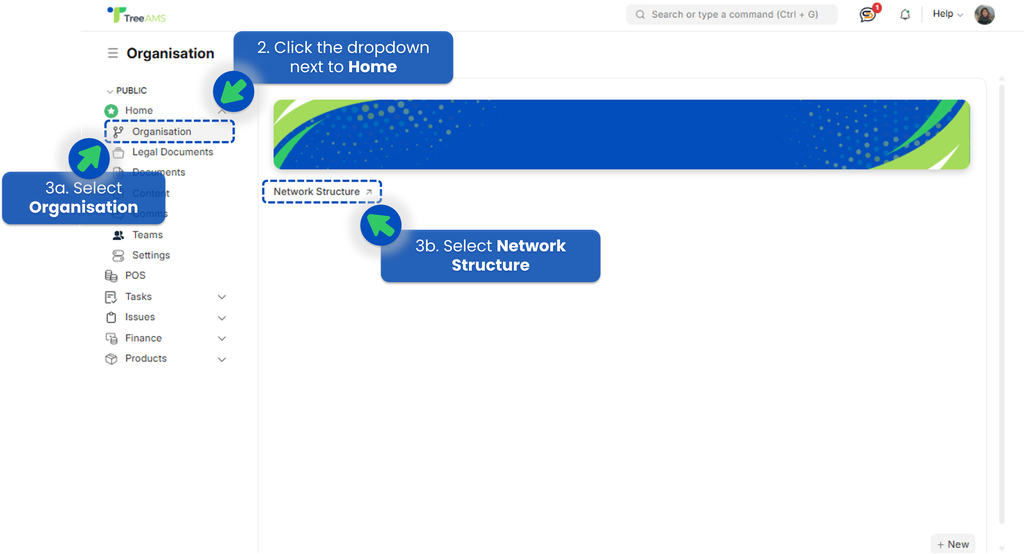
- Go to Desk. Learn how you can switch to Desk here!
- Click the dropdown next to Home menu.
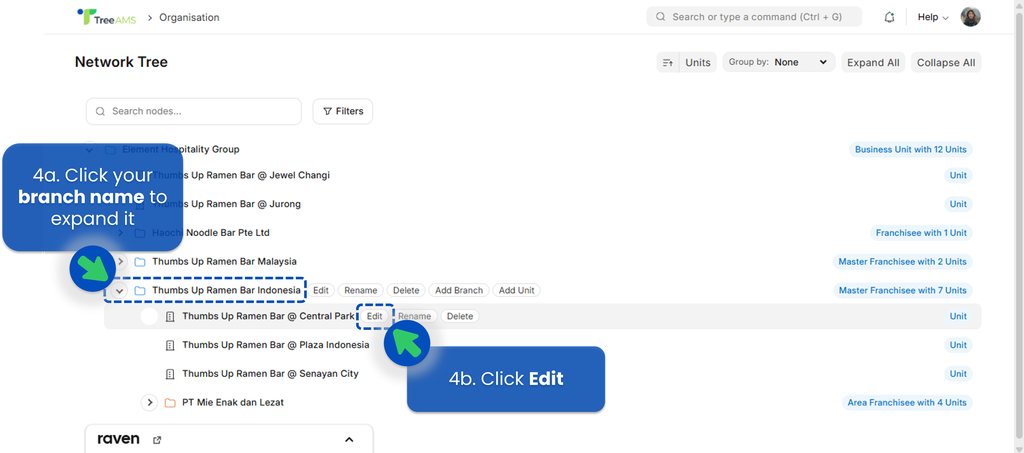
- Select Organisation → Network Structure.
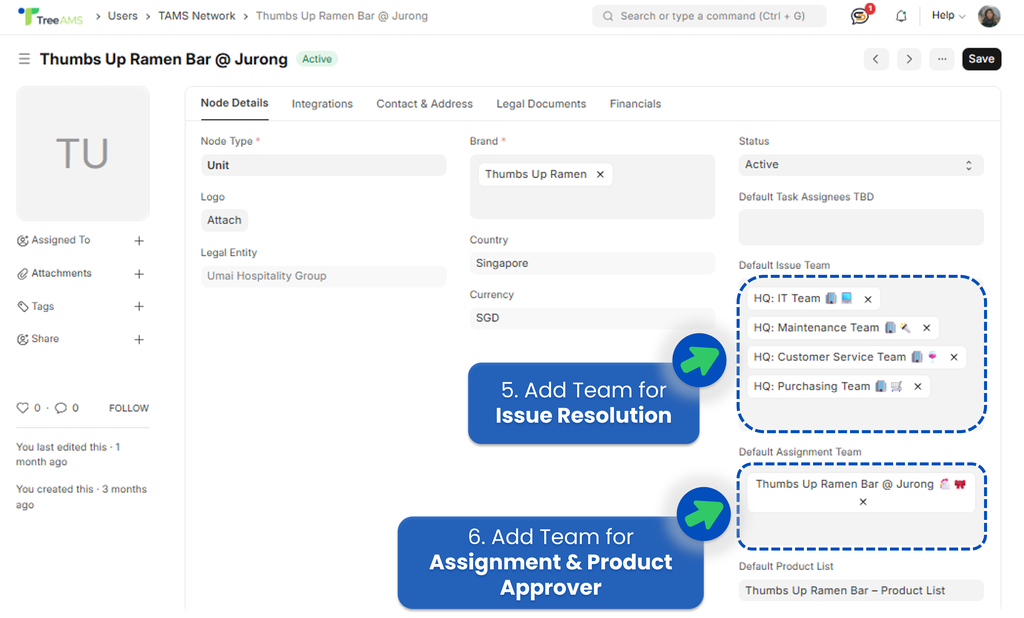
- Hover over the branch / unit that you want to set up → Click Edit
- Add at least one team for issue resolution.
- Add at least one team as Assignments Team, Product Approver (in Product Cart) or Product Receiver (in Product Level - Stock Transfer).
- Click Save
💡 If you have different issue types, it is strongly recommended that you have all the issue fixer teams as the Default Issue Team.
💡 Make sure that the team has at least one team manager and assignee!
Creating a Department
Again, to create a department, your role must be either a Site Admin or a Site User with the TreeAMS Teams Manager sub-role. For more details on the different roles in TreeAMS, refer to User Types. If you're unsure of your role, please check with your manager, supervisor, or administrator.
- Go to Desk. Learn how you can switch from Portal to Desk here.
- Click the dropdown next to Home.
- Select Teams.
- Click Departments.
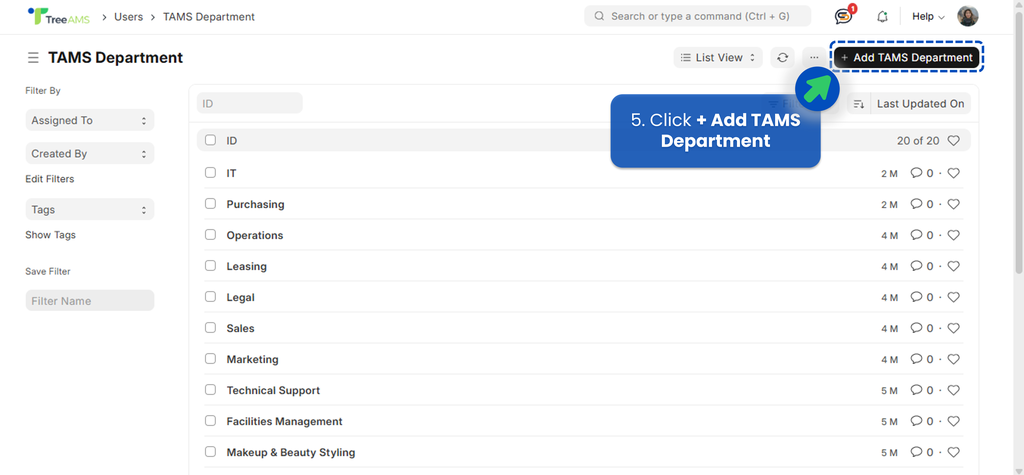
- Click + Add TAMS Department.
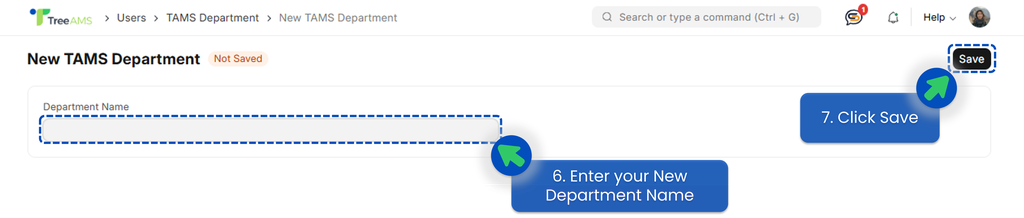
- Enter the name of your new department.
- Click Save.