Adding & Disabling a User
This section covers:
Adding a New User
- Go to Desk. Learn how you can switch to Desk here!
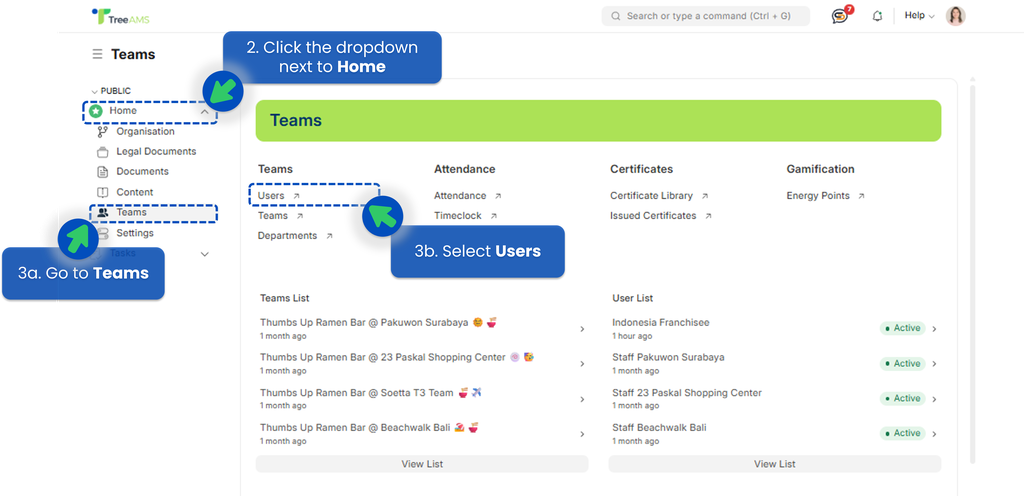
- Click the dropdown next to Home menu.
- Select Teams -> Users.
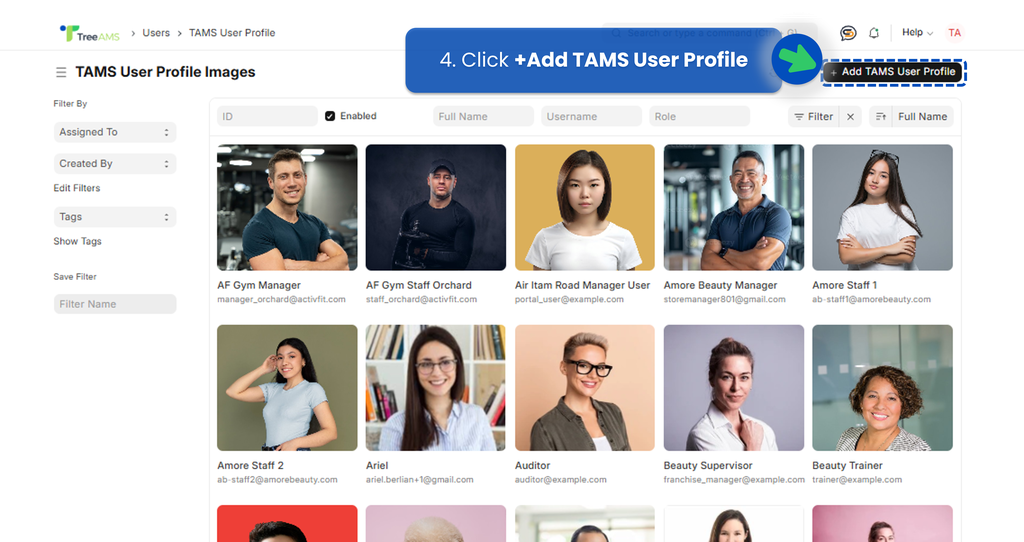
- Click +Add TAMS User Profile
- Start adding information on the new User
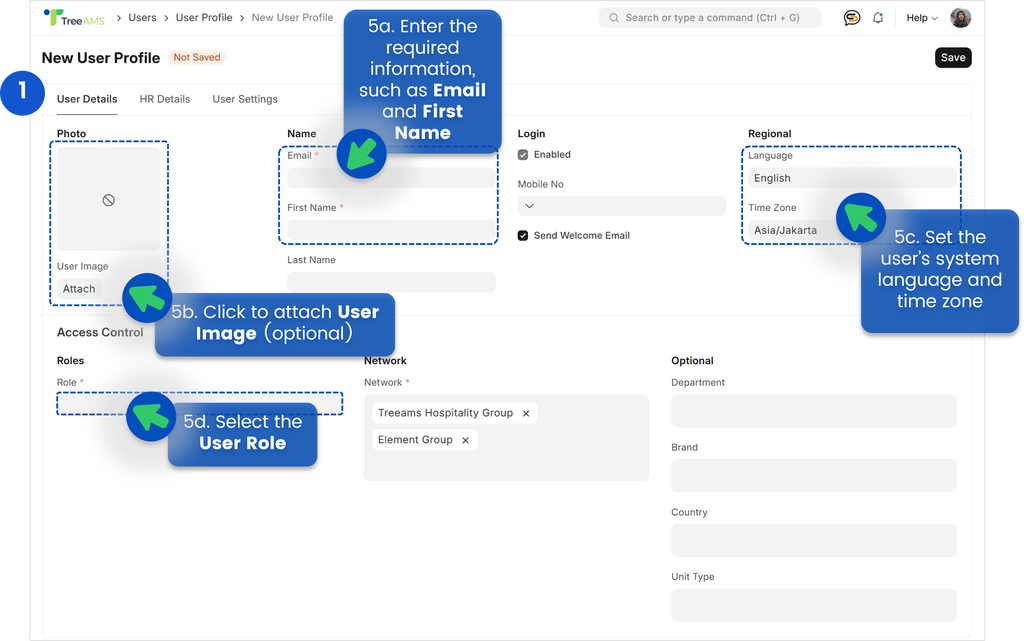
- [5a] Enter the required fields, such as 👉 Email and First Name.
- [5b] This is optional, but you can attach a user profile image using the Attach button.
- Crop ratio is fixed at 1:1
- Your image will be resized to 600 × 600 pixels
- Maximum file size: 250 KB
- Supported formats: JPEG, JPG, and PNG
- [5c] Set the user’s system language and time zone.
- [5d] Select the User Role
💡 Check out the available languages
💡 Check out the available User Roles
- Continue setting up the user. Please refer to the guide below based on the selected role.
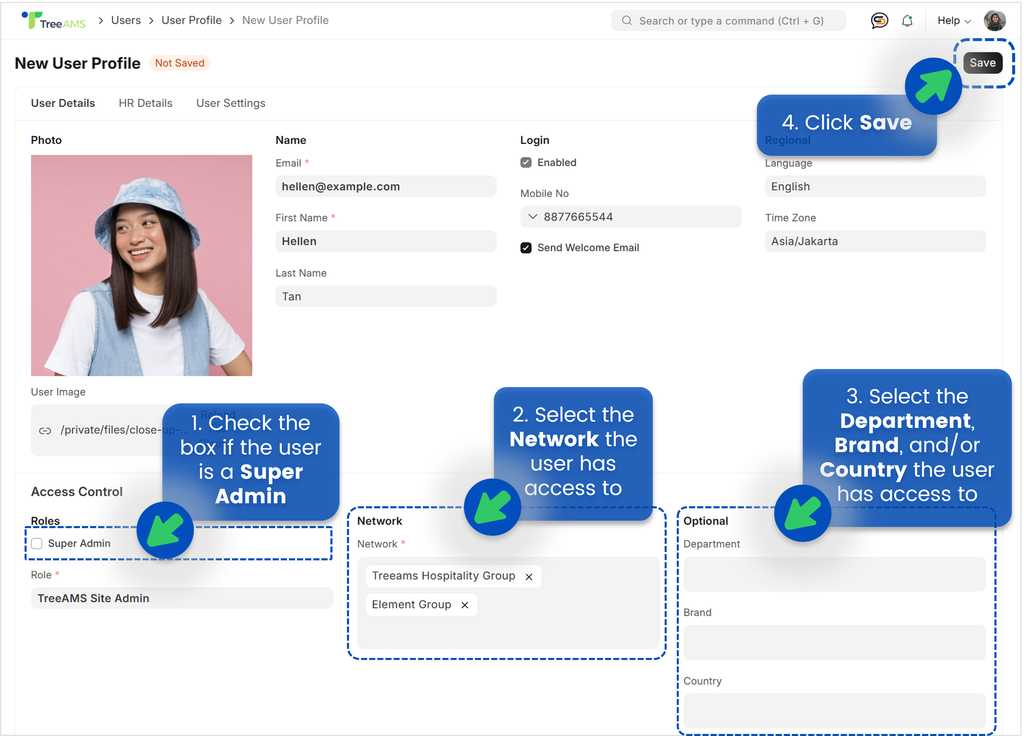
- Site Admin
- Check the box if the user is a Super Admin. Find out what a Super Admin is here
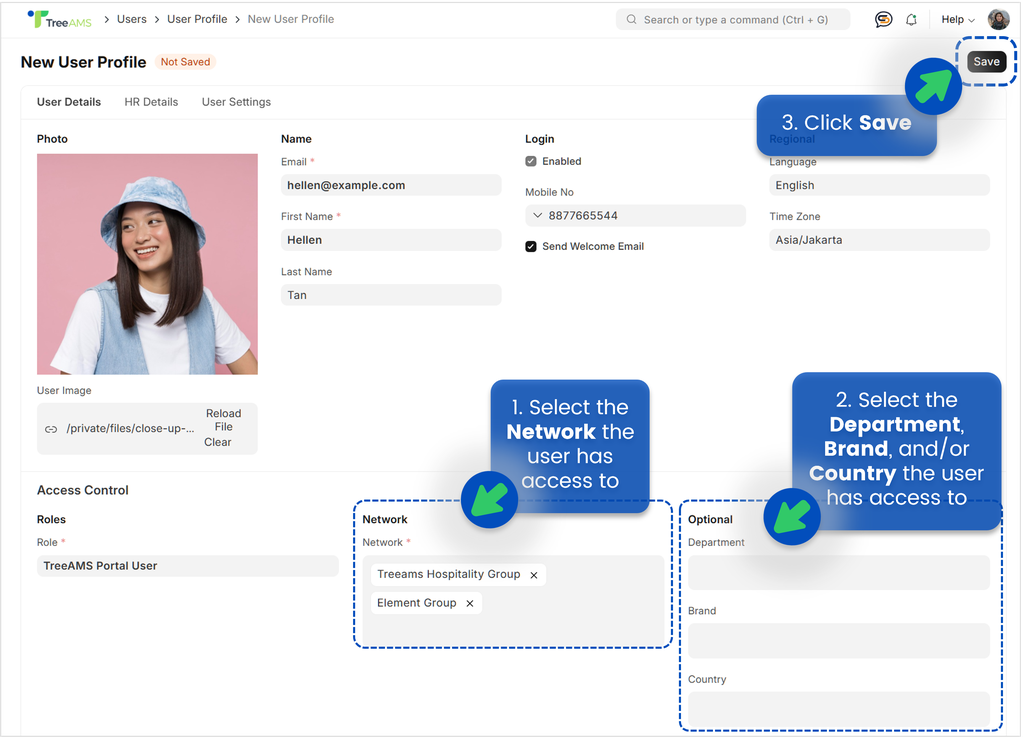
- Select the Network the user has access to
- Select the Department, Brand, and/or Country the user has access to
- Click Save
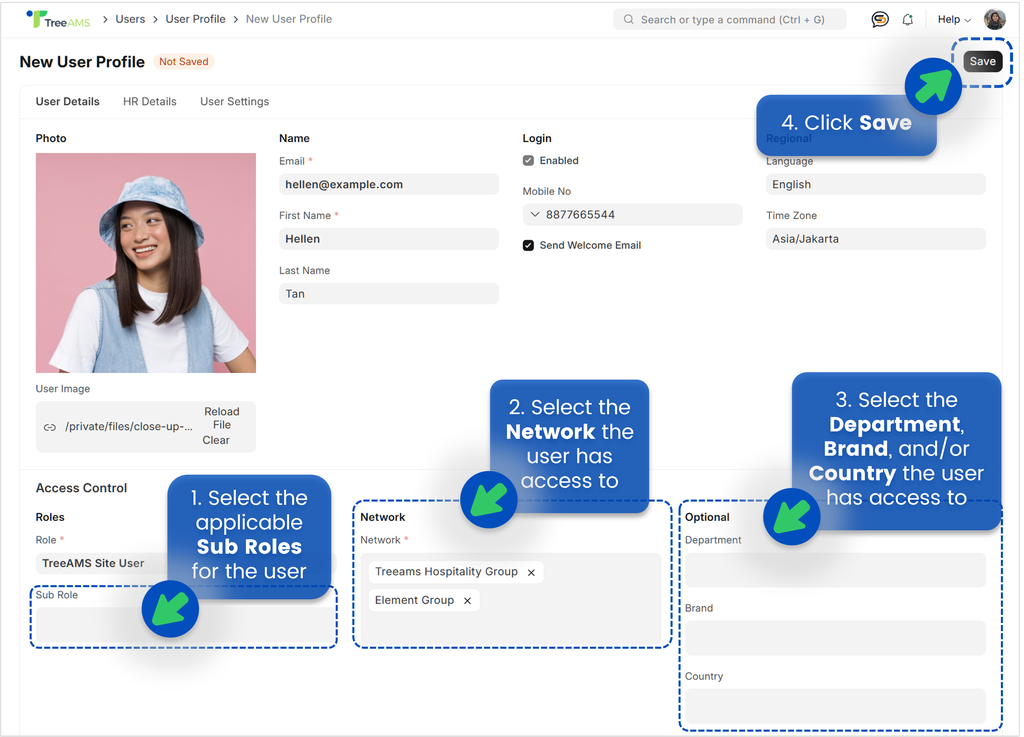
- Site User
- Select the applicable Sub Roles for the user. Check out the available Sub-Roles
- Select the Network the user has access to
- Select the Department, Brand, and/or Country the user has access to
- Click Save
- Select the applicable Sub Roles for the user. Check out the available Sub-Roles
- Portal User
- Select the Network the user has access to
- Select the Department, Brand, and/or Country the user has access to
- Click Save
- Site Admin
Password Reset
In TreeAMS, Password Reset is useful when a user is about to start using TreeAMS or when they simply need help with resetting their password.
Here, you can reset the password for a single user.
How to reset password for a user
- Go to Desk. Learn how you can switch to Desk here!
- Click the dropdown next to Home menu.
- Select Teams -> Users.
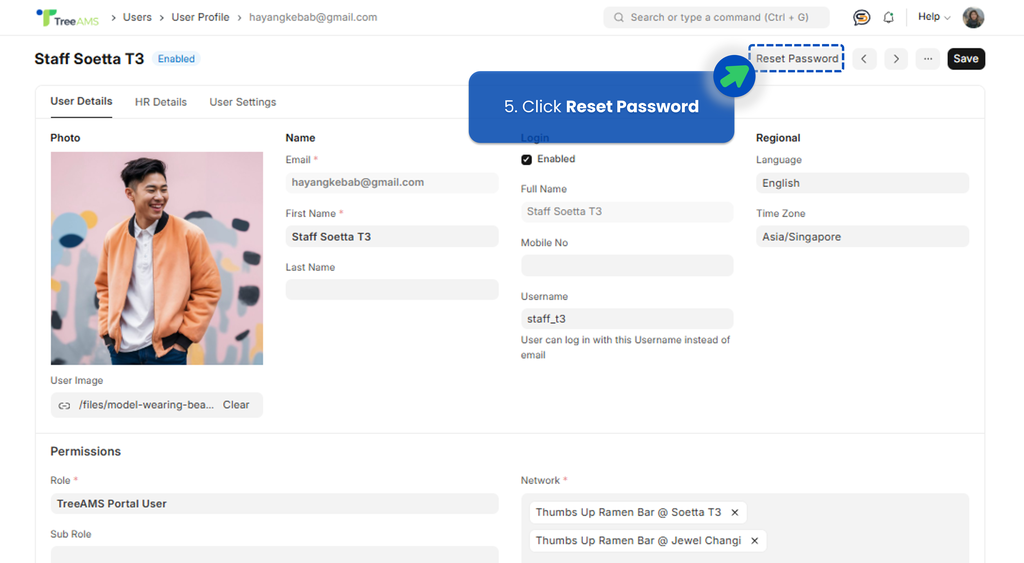
- Find and select the User whose password you want to reset.
- Click Reset Password, then the user will receive an email prompting them to reset their password.
Disabling a User
In TreeAMS, Disabling a User refers to revoking user access to the platform without permanently deleting their account. A disabled user cannot log in or interact with the system, but their data and permissions are retained.
This feature is useful for situations like staff transitions, extended leave, and even resigned staff members.
⚠️ Important: TreeAMS strongly advises against deleting a user. Each user is linked to critical data, and deletion may cause data loss or system errors.
Take note: After disabling a user, the Team Manager must manually remove the user from all teams they were previously assigned to.
In TreeAMS, you can choose to either disable a single user or disable multiple users at the same time.
How to disable a user
- Go to Admin Site (Desk). Learn how you can switch to Admin Site (Desk) here!
- Click the dropdown next to Home menu.
- Select Teams -> Users.
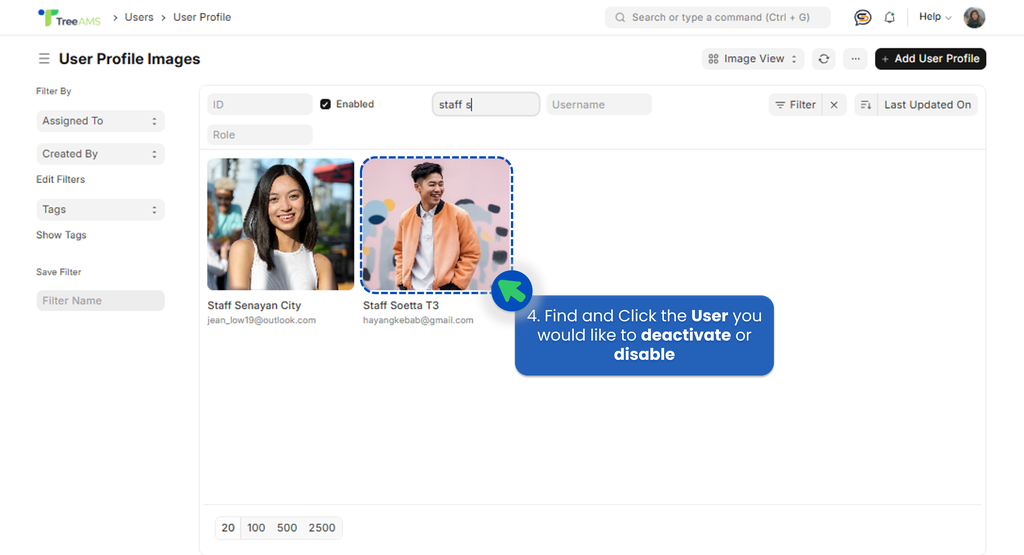
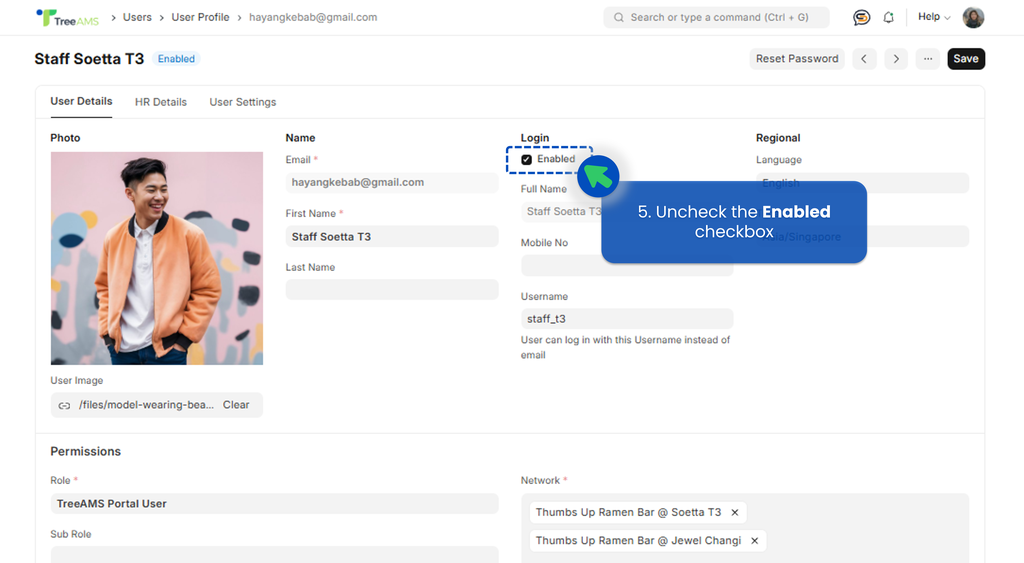
- Find and click the User you would like to deactivate or disable
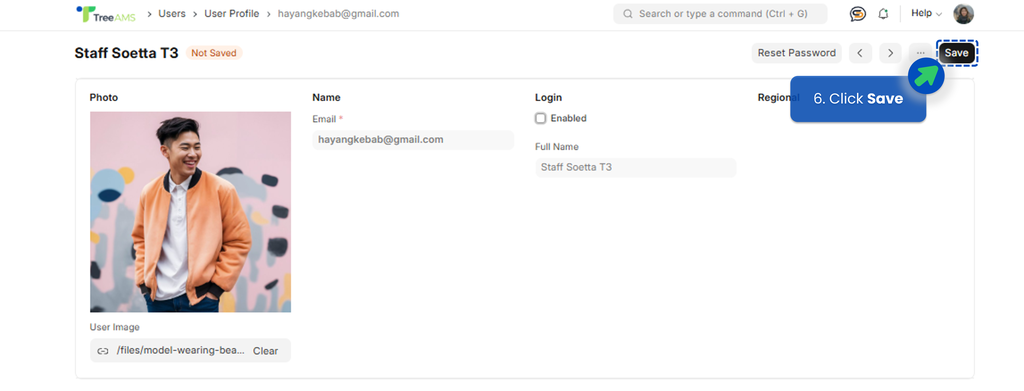
- Uncheck the Enabled checkbox
- Click Save
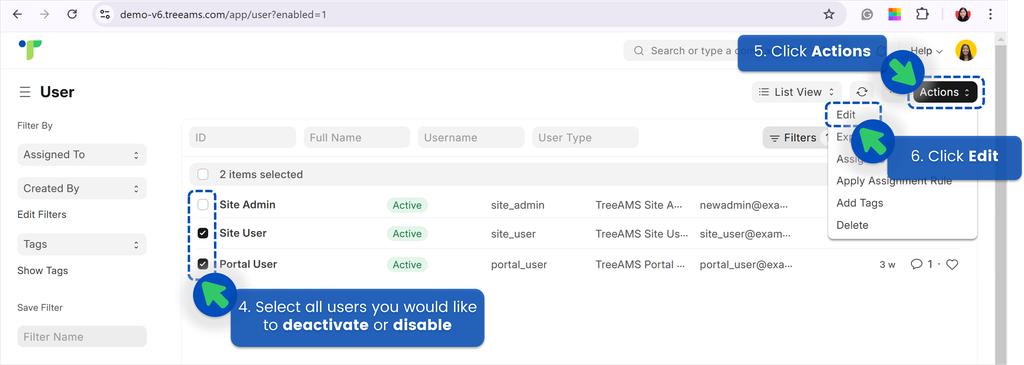
How to disable multiple users
- Go to Admin Site (Desk). Learn how you can switch to Admin Site (Desk) here!
- Click the dropdown next to Home menu.
- Select Teams -> Users.
- Select List View
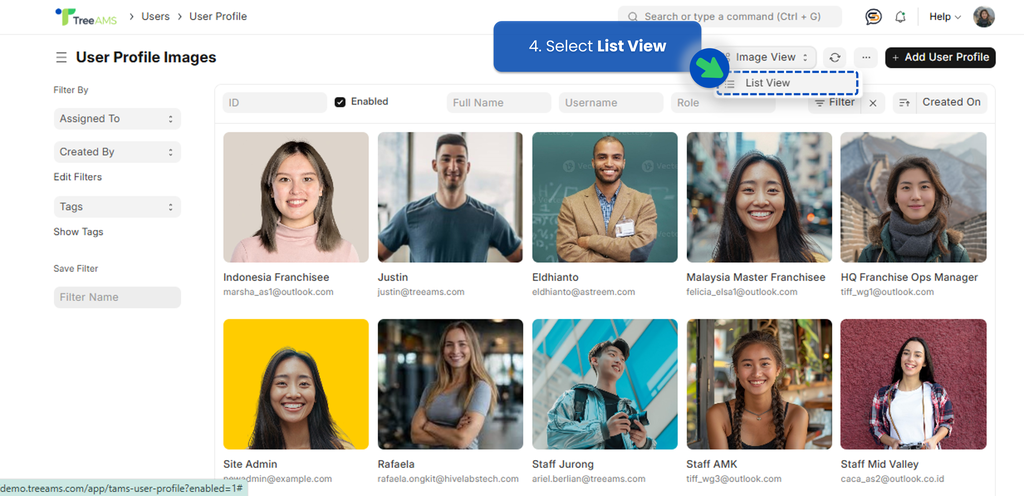
then select all users you would like to deactivate or disable. - Click Actions
- Click Edit
- Select Enabled for the field
- Uncheck the Value checkbox
- Click Update Records