Adding a Document into a Network
On TreeAMS, you can store multiple documents into each network and get reminders when you need to get notified on expiring documents! Documents that can be stored are but not limited to: franchise agreements, contracts, licenses, and certificates. In fact, it doesn't have to be a document. You can also use this feature as a reminder. Follow below steps to start adding documents and reminders for your TreeAMS account!
This section covers:
Video Guide: How to Add Legal Documents in TreeAMS
Watch the video below to easily understand our Legal Document section and how to create a new legal document.
Adding Documents to Network
- Go to Desk. Learn how you can switch to Desk here!
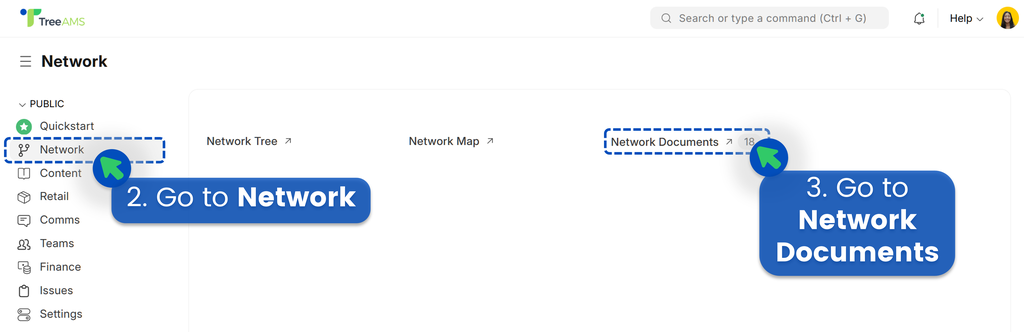
- Select Network
- Click Network Documents
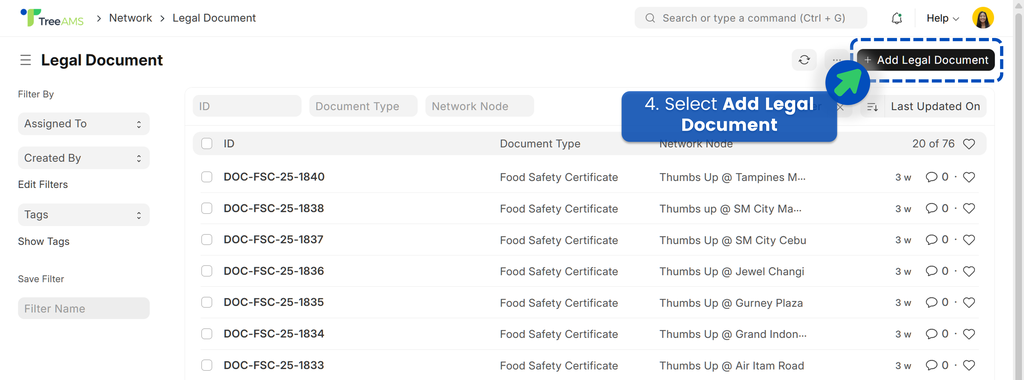
- Select Add Legal Document
- Complete the document's information!

- Document Type: refers to the category or classification of the document within your TreeAMS site. It helps organise and filter documents based on their purpose or content. Please note that the number and timing of expiring document reminders depend on the selected document type.
- Document Name: is the specific title of the document, used to clearly identify its content or purpose.
- Network Node: refers to the unit or branch within your organisation where the document is relevant or assigned.
- Click Save
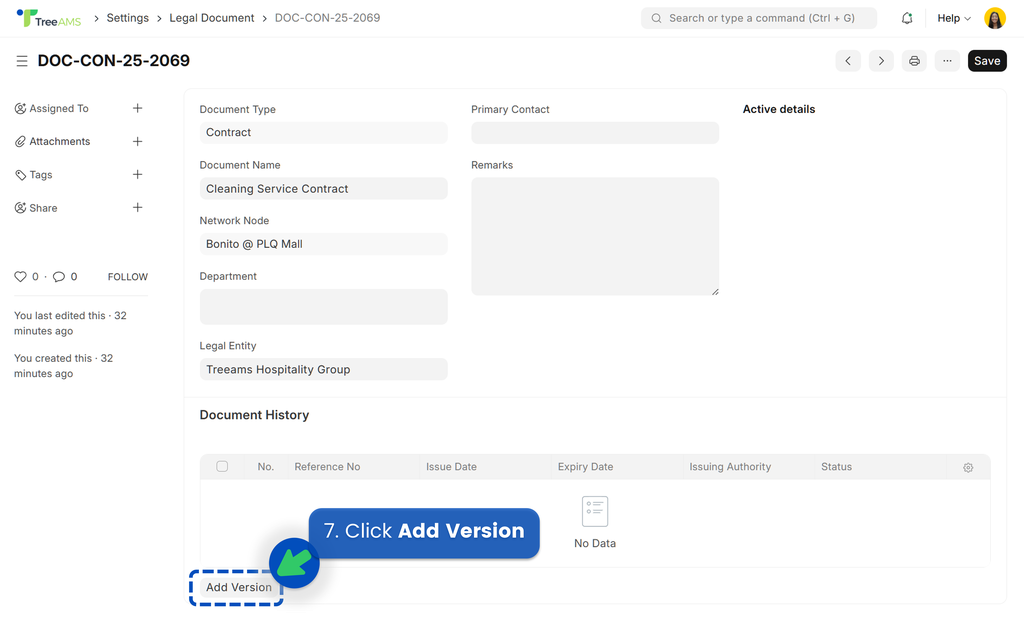
- Next, let's add the document! Under Document History, click Add Version
- Complete the document details. Most fields are optional, but it's highly recommended to fill them in for better tracking and document management.
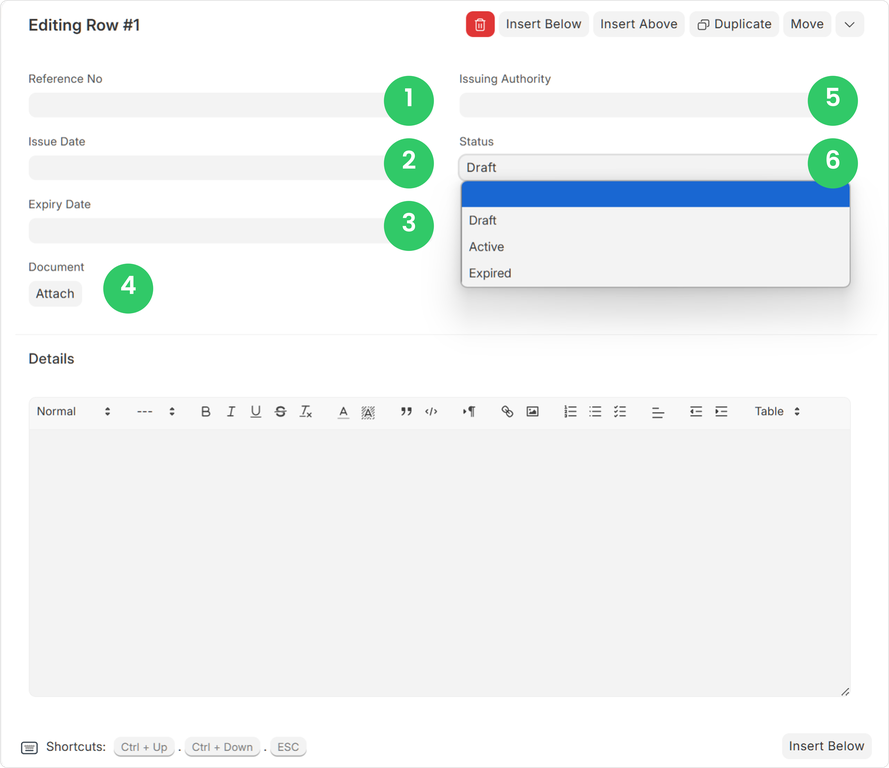
- Reference No: This is optional, buy you can input your document's unique ID or code for easy tracking and identification here!
- Issue Date: The date the document was officially created, published, or released.
- Expiry Date: The date the document is set to become outdated or needs to be reviewed or renewed.
- Document/Attach: Click the Attach button to upload a document. This is optional especially if you only want to get reminders from the system.
- Issuing Authority: The person, team, or department responsible for creating and approving the document.
- Status:
- Draft: The document is still being prepared and not yet finalised.
- Active: The document is current, approved, and in use.
- Expired: The document is no longer valid and may need to be updated or replaced.
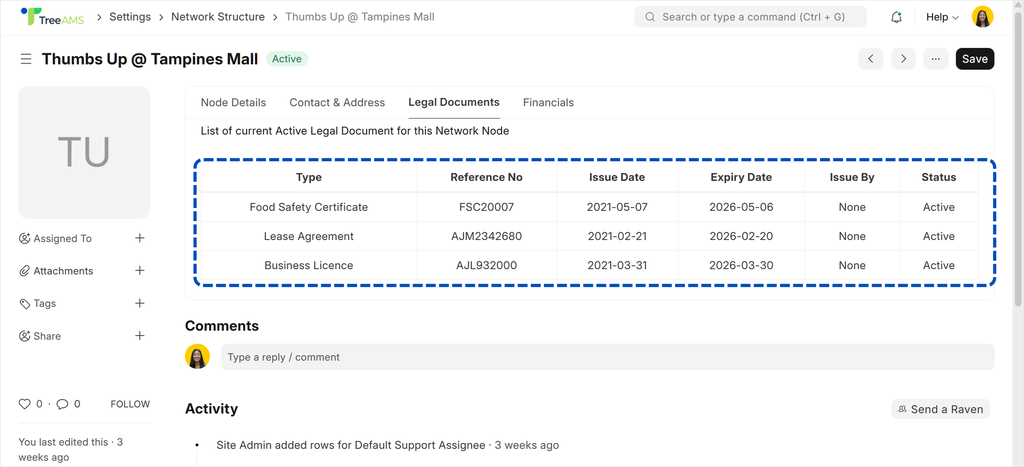
- You have added a document to your network successfully! To see it from your network, go to Network, Network Tree, select the unit or branch, click Edit, and choose the Legal Documents tab. It'll look like this 👇
Document Types
In TreeAMS, you can group your documents based on their objective or purpose. We've provided some common document types to get you started, but you can also create your own if needed or delete what you don't need.
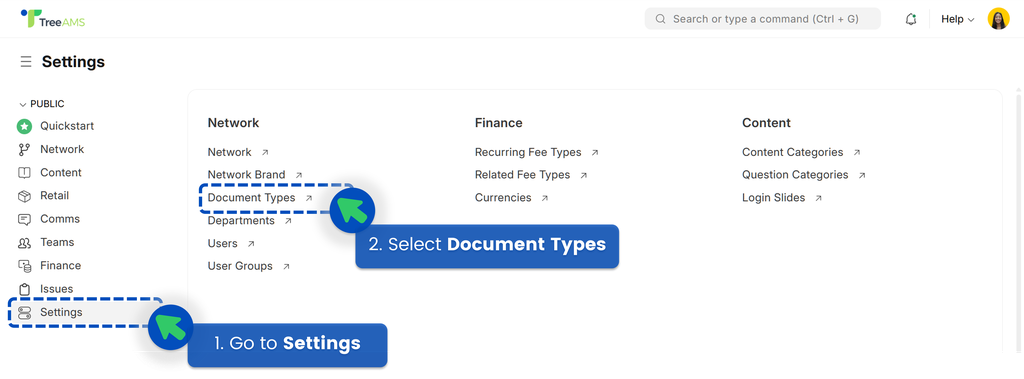
- On the Desk site, go to Settings
- Select Document Types
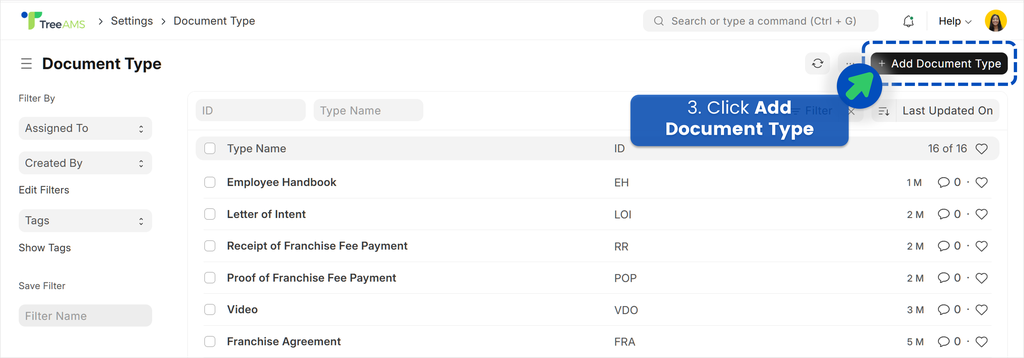
- Click Add Document Type
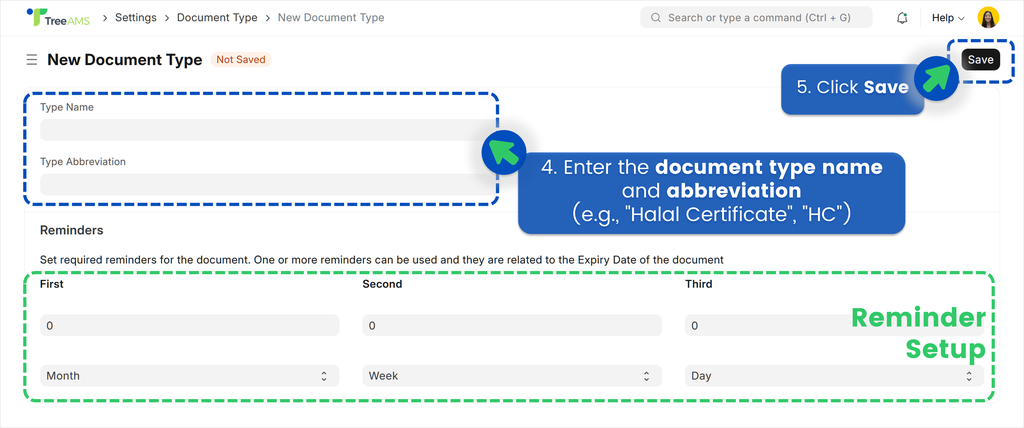
- Enter the document type name and abbreviation (e.g., "Halal Certificate", "HC"). While you're at it, you can also set when you'd like to receive reminder notifications!
- Click Save
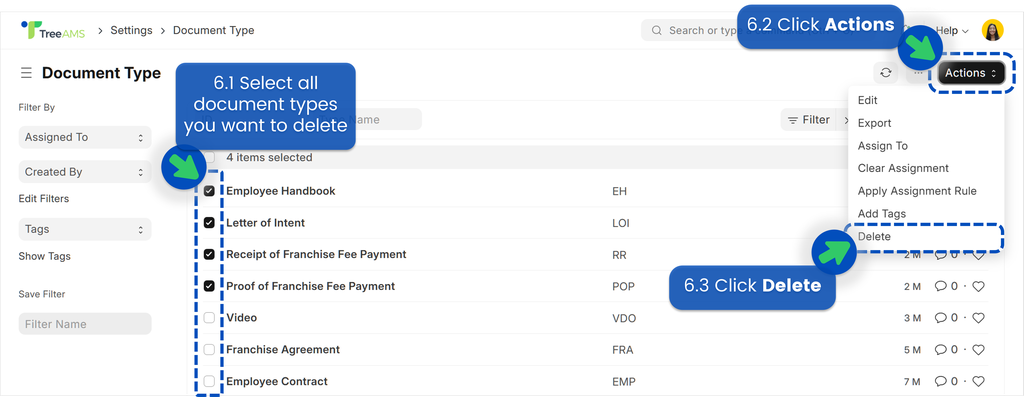
- Lastly, if you need to delete document types you don't need, simply select the document types, click Action, and choose Delete. Make sure the document types you want to delete are not being used by any legal documents.