Adding a Product
This section covers:
Adding a Product
💡 During product setup, you can request our team to bulk import your products into TreeAMS. Just reach out to our Customer Success team or email us at connect@treeams.com .
- Go to Desk. Learn how you can switch to Desk here!
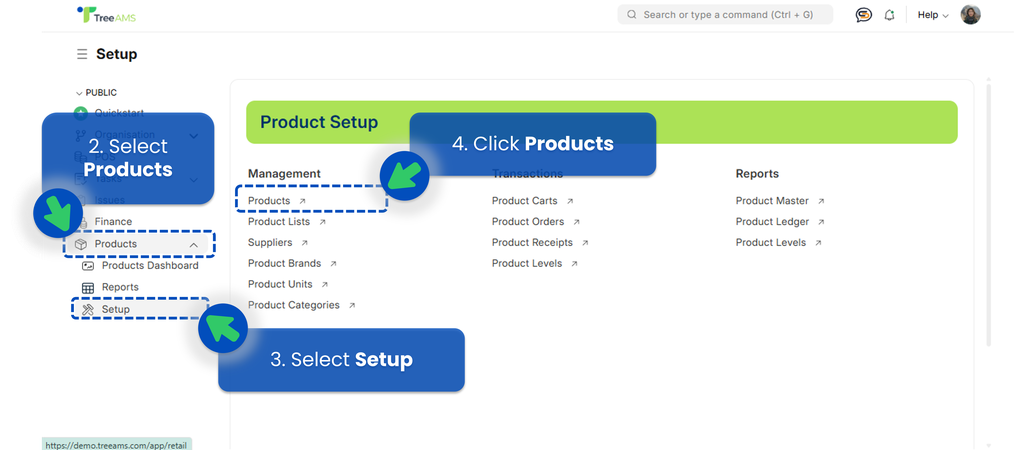
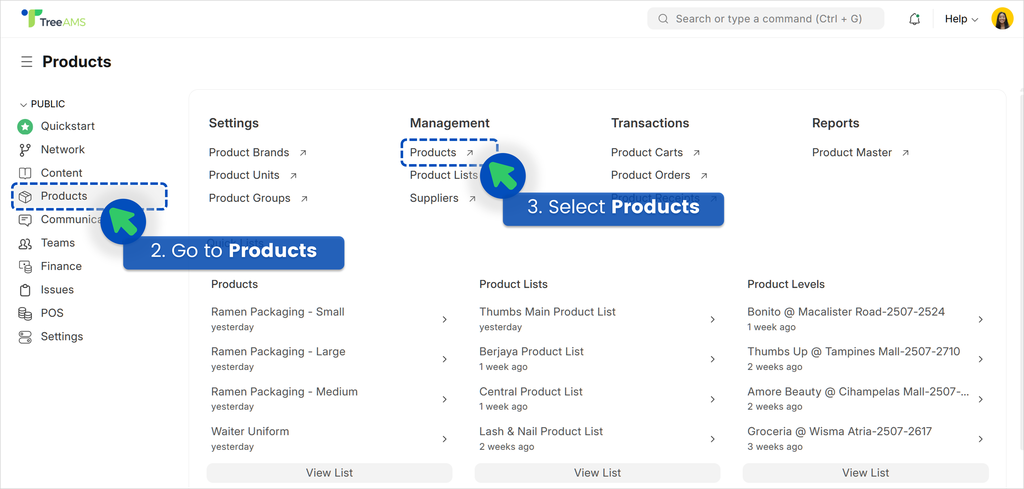
- Go to Products
- Click Setup
- Select Products
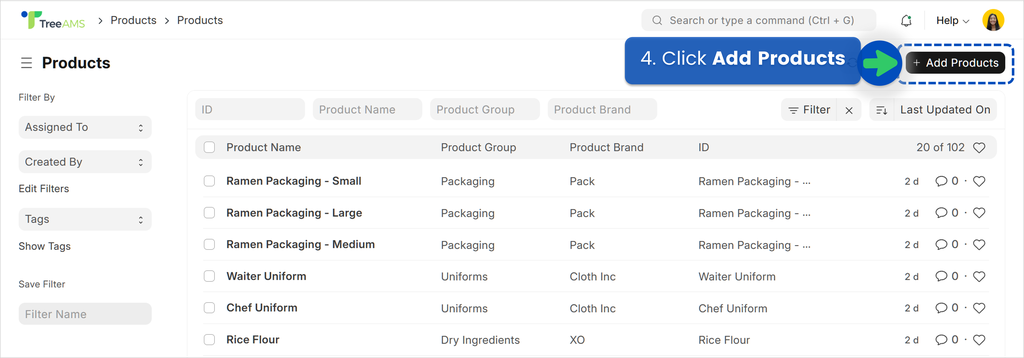
- Click Add Products
- Enter the Product Name
- Enter the Product Group
- This is optional, but you can put the Product Brand
- Select the Product Unit (Unit of Measurement)
- Enter the minimum stock level
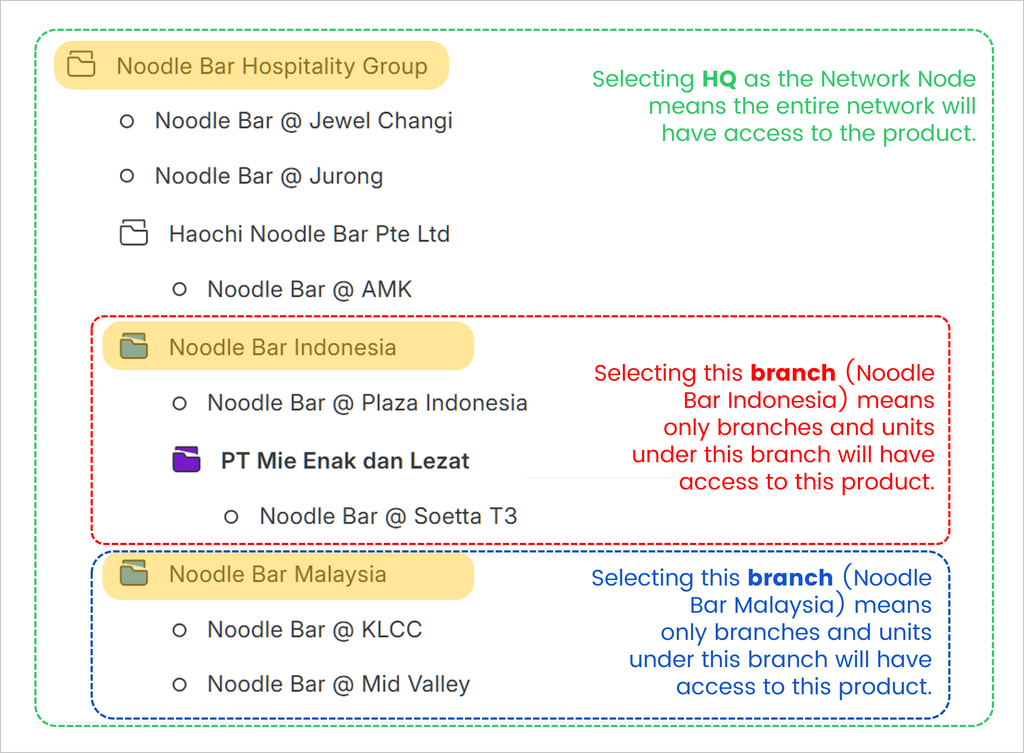
- Determine the access level by selecting a branch. Please refer to below illustration for more details.
- Add the product’s price
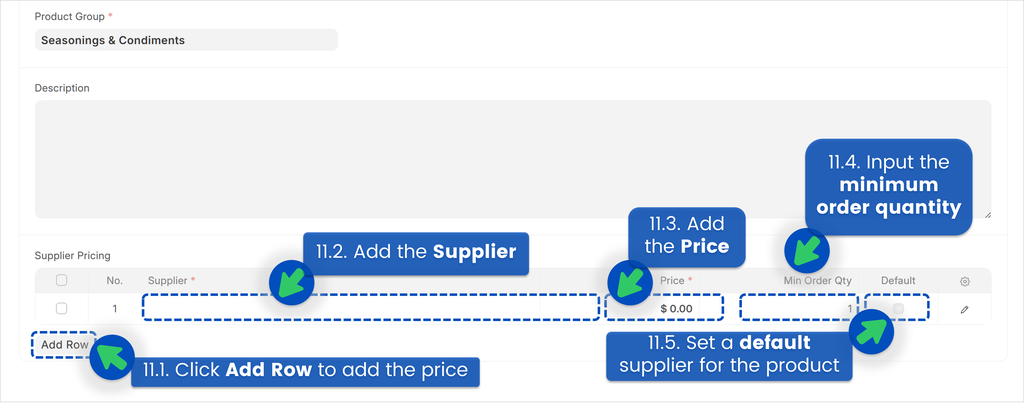
- Click Add Row to add the product's price
- In the Supplier field, select your supplier for the product. If you don't have any suppliers, go to Adding a Supplier to find out how you can add one!
- Add the product price
- Input the Minimum Order Quantity
- Set the supplier as Default. If you have multiple suppliers for a product, this ensures that stores or franchisees order from your preferred supplier. This step is required even if you have only one supplier.
- You can repeat from Step 1 to add more suppliers for the product!
- Click Save

Deleting a Product
- Go to Desk. Learn how you can switch to Desk here!
- Go to Products
- Select Products
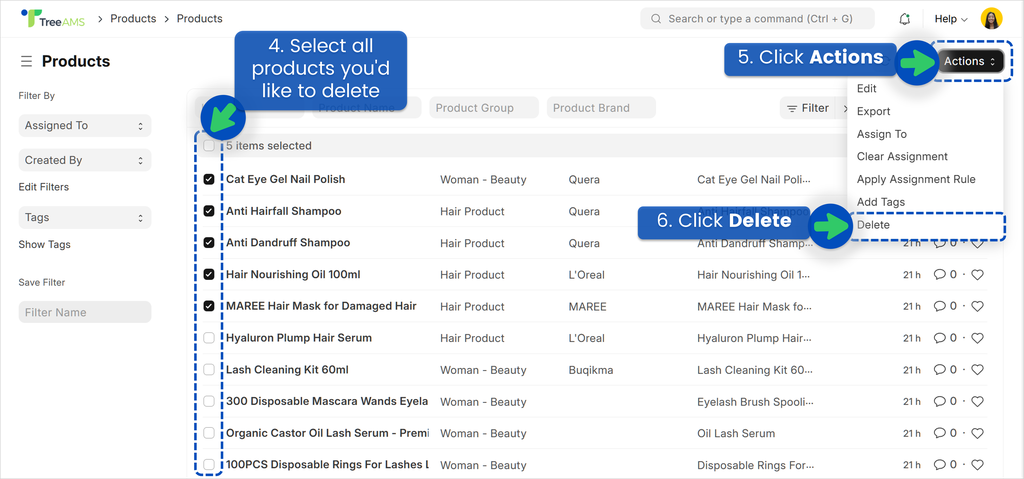
- Select all products you'd like to delete
- Click Actions
- Click Delete
If the products are used in any product lists or have existing orders, you may not be able to delete them. Alternatively, you can deactivate them instead. See Deactivating a Product for more details.
Deactivating a Product
Deactivating a product means it will no longer be available in product levels, product orders, and the product ledger. This action is not permanent—you can reactivate the product anytime.
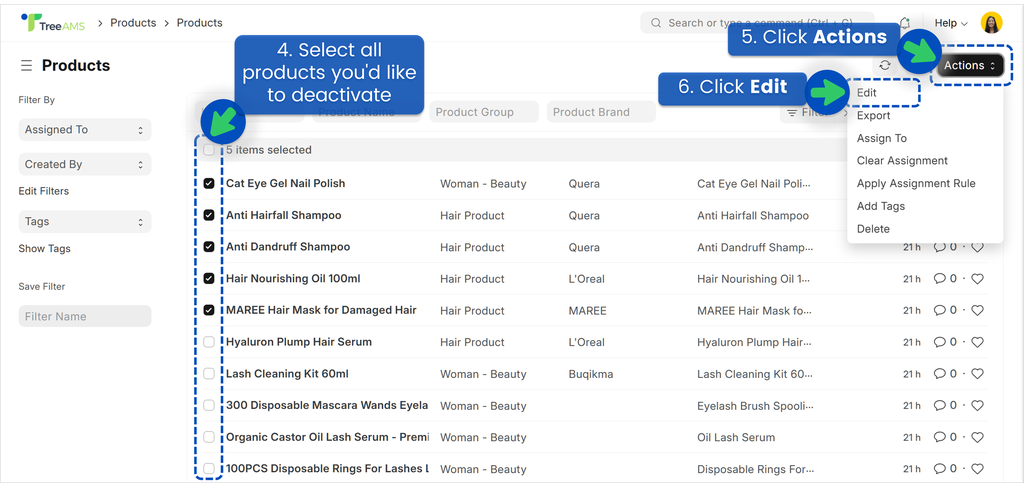
- Go to Desk. Learn how you can switch to Desk here!
- Go to Products
- Select Products
- Select all products you'd like to deactivate
- Click Actions
- Click Edit
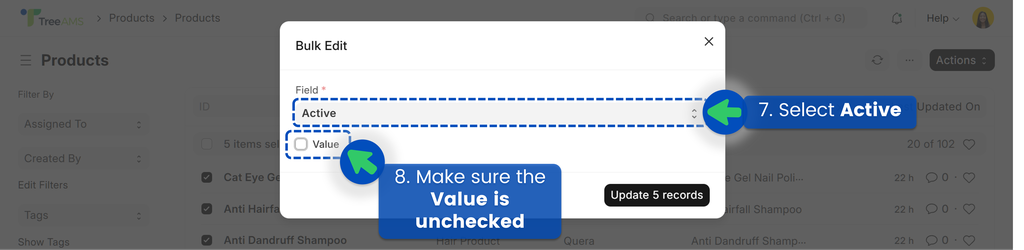
- In the dropdown, select Active
- Make sure the Value is unchecked and you have successfully deactivated the product(s)!
- Alternatively, you can also deactivate a product one by one. Simply uncheck the Active button in the product's page