Setting Up a Geolocation Tag
This guide will help you set up a geolocation tag for your unit/outlet. This ensures that employees can only use feature that support geolocation tag (e.g. Clock In/Out, Checklist with geolocation tag enabled) when they are within the designated location radius.
IMPORTANT ‼️
- Gelocation is only available for units not branches
- Do ensure that you have added the unit's primary address to use this feature
How to Set Up a Geolocation Tag
To set up a Geolocation Tag, your role must be either a Site Admin or a Site User with the TreeAMS Network Manager sub-role. For more details on the different roles in TreeAMS, refer to User Types. If you're unsure of your role, please check with your manager, supervisor, or administrator. Here's how to set it up:
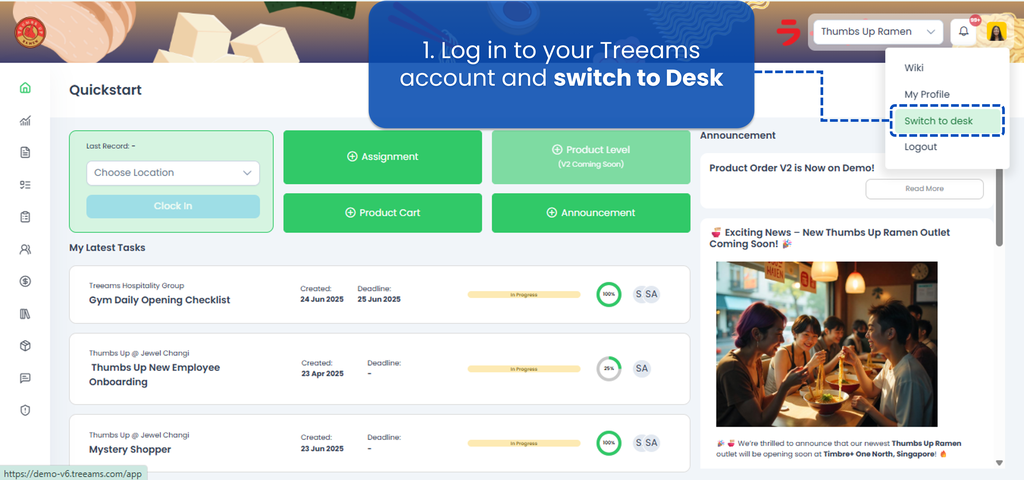
- Log in to your Treeams account and switch to Desk. Learn how you can switch from Portal to Desk here.
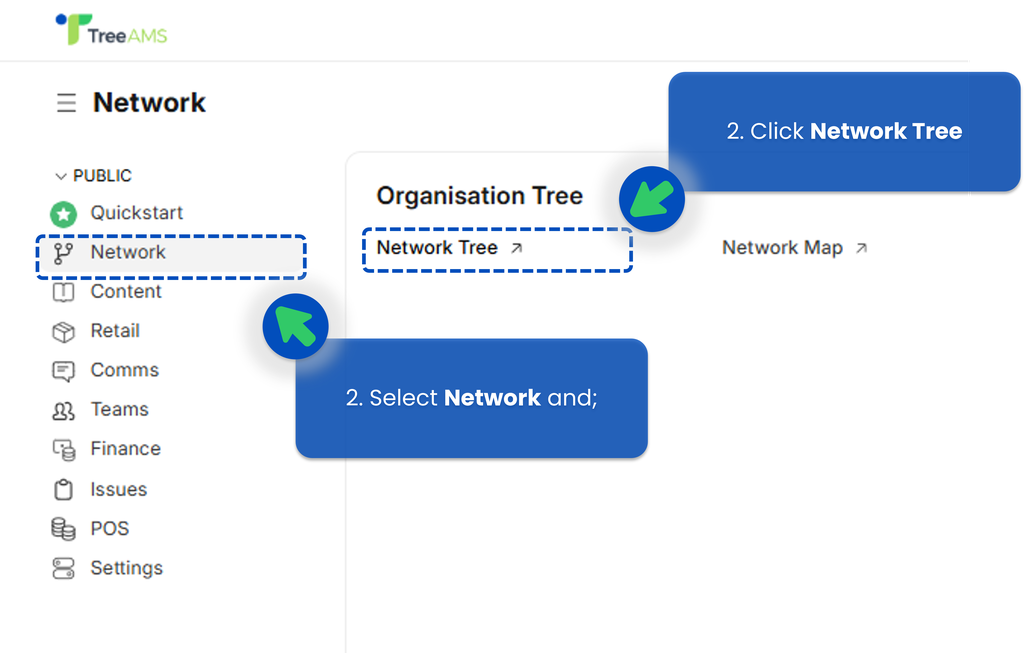
- From the left menu, select Network and click Network Tree.
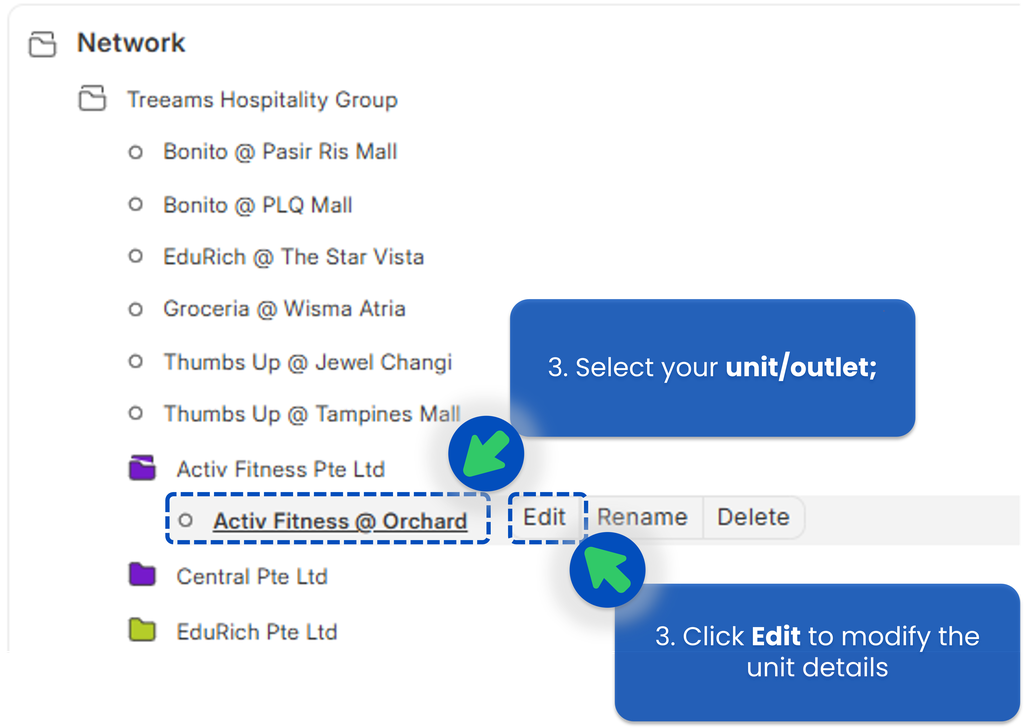
- Select your unit/outlet, only stores or unit level can use location-based attendance because stores/units can set both address and exact GPS location while Branches/HQ can only save addresses (no GPS tracking). Then click Edit to modify the unit details.
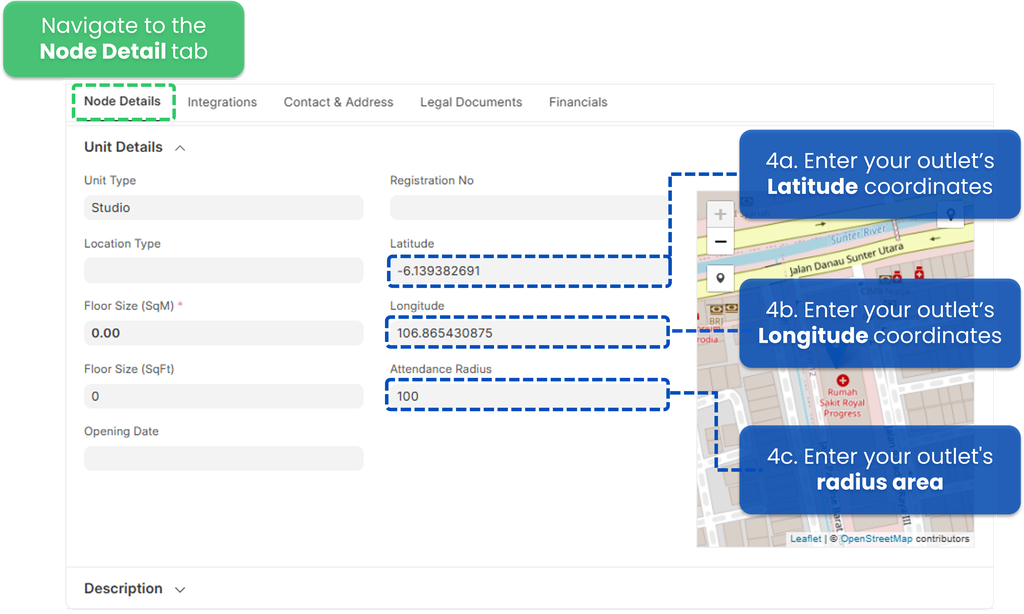
- Navigate to the Node Detail tab. Scroll down to the Unit Details section. Set the following fields:
- Latitude 👉 Obtain this from Google Maps or any other map application. Right-click on the desired location in Google Maps and copy the coordinates.
- Longitude 👉 Similarly, retrieve this from Google Maps along with the latitude.
- Attendance Radius (in meters) 👉 Default is 50 meters, but you can adjust this based on your needs. If the GPS pin is not perfectly accurate, a larger radius (e.g., 100m) can help avoid clock-in issues.
- Set the Primary Address (For Reference).
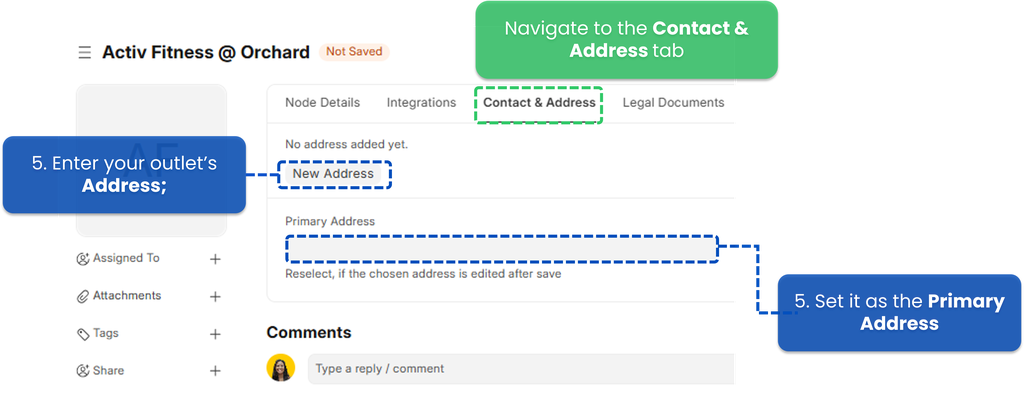 Go to the Contact & Address tab. Ensure the address of the outlet/location is correctly listed. Mark it as the Primary Address.
 - Click Save to apply changes.