Setting up the Scorecard
This section covers:
What You Need to Prepare Before the Setup
The TreeAMS Scorecard pulls existing data from your TreeAMS account, so what you see depends on what's been filled in. The Scorecard works with whatever modules you have active, so just make sure the data for those modules is complete for the period you want to review.
If you have:
Finance Module — then ensure your finance module has been filled in, or that your POS integration is connected and syncing correctly.
Audit Module — audits should be completed and submitted for the relevant period.
Training Module — training records should be up to date across your outlets.
Checklist Module — checklists should be done consistently throughout the period.
Keep in mind that the TreeAMS Scorecard reflects the period you select. If you want to view quarterly data, you'll need at least a full quarter's worth of entries.
Setup Guideline
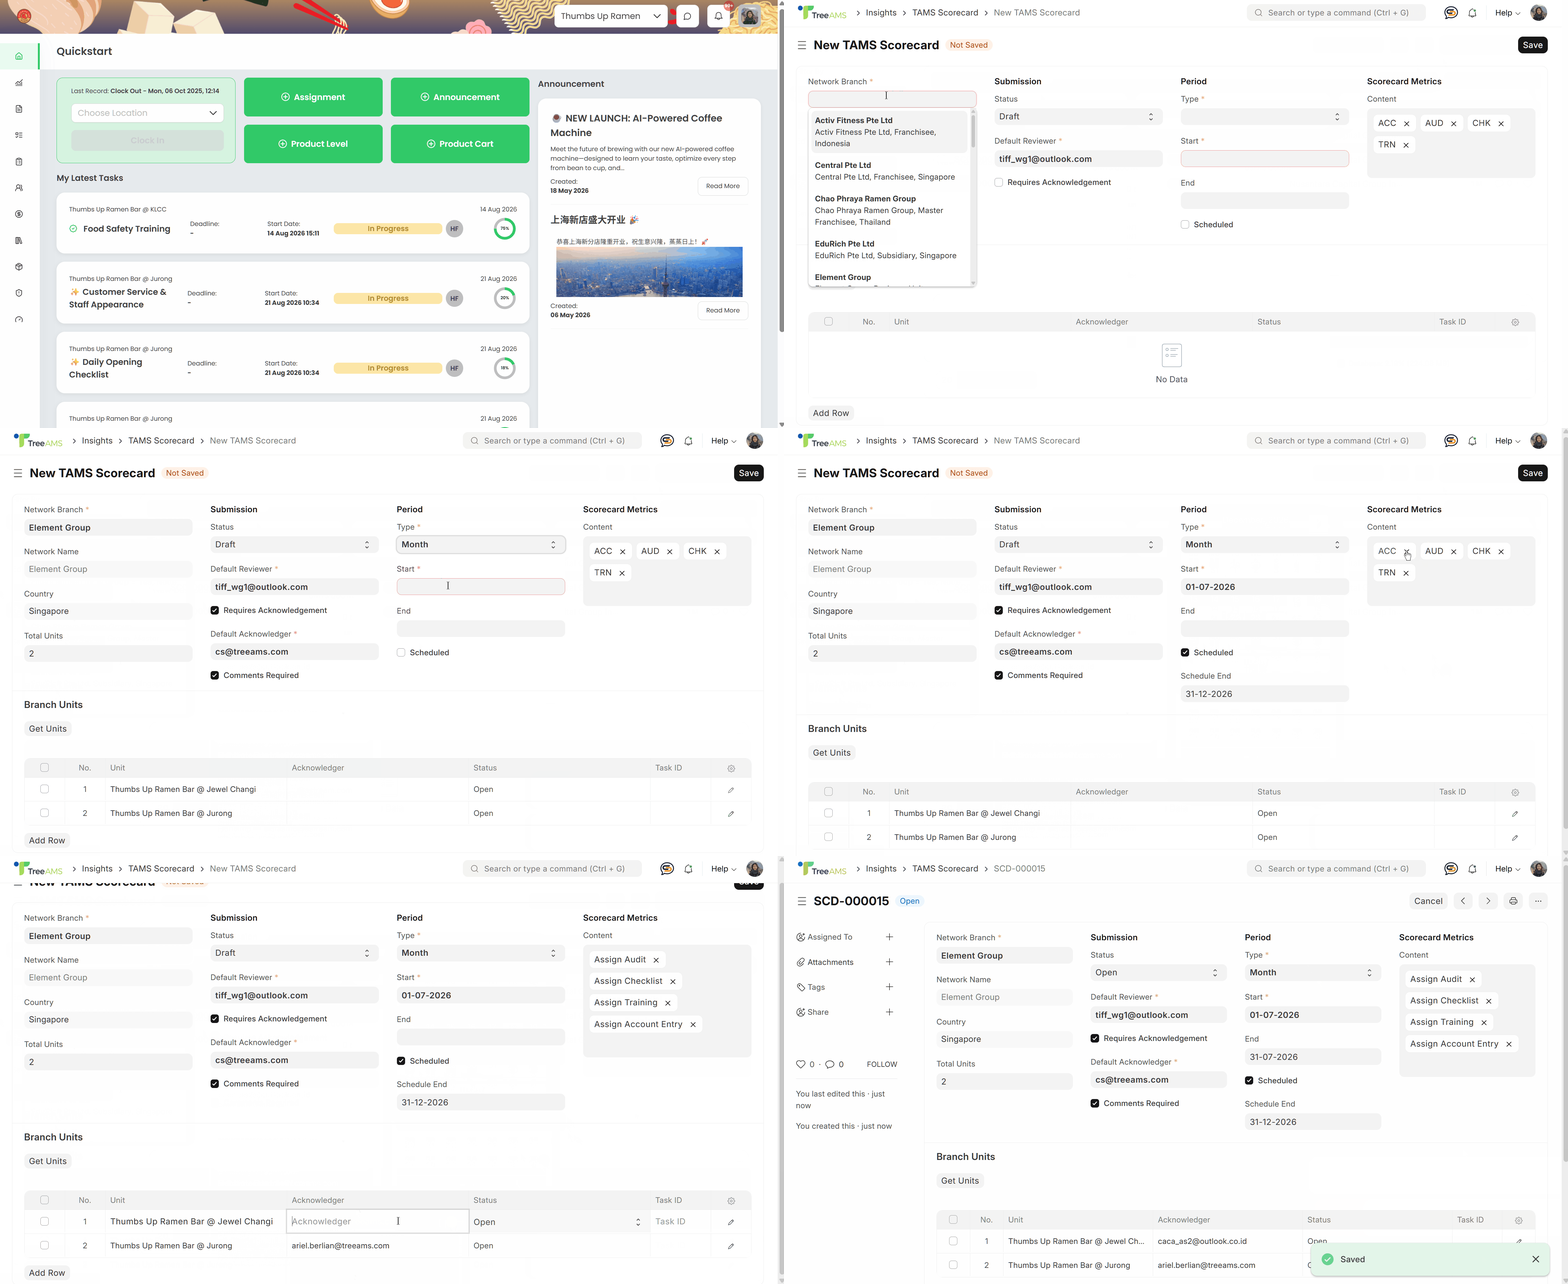
Log in to your TreeAMS account and go to Admin Site (Desk). Learn how you can switch to Admin Site (Desk) here!
From the left menu, select the Scorecard tab. Then select the Scorecard Setup.
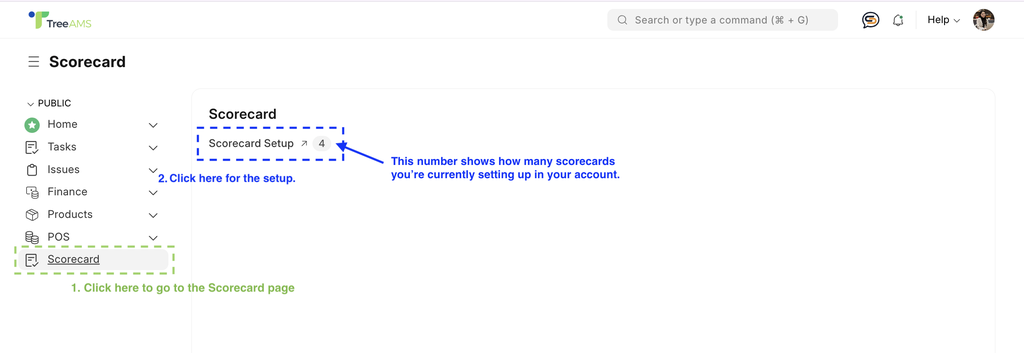
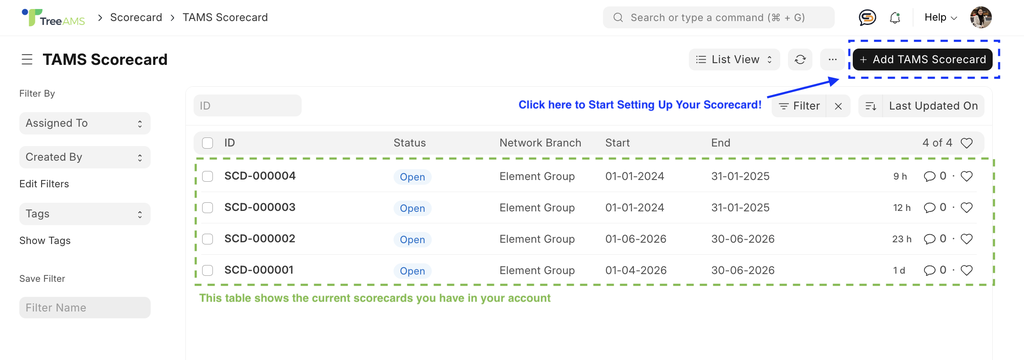
- Once clicked, you'll be taken to the Scorecard Setup page where your existing setups are listed. From here, click Add TreeAMS Scorecard to create a new one.
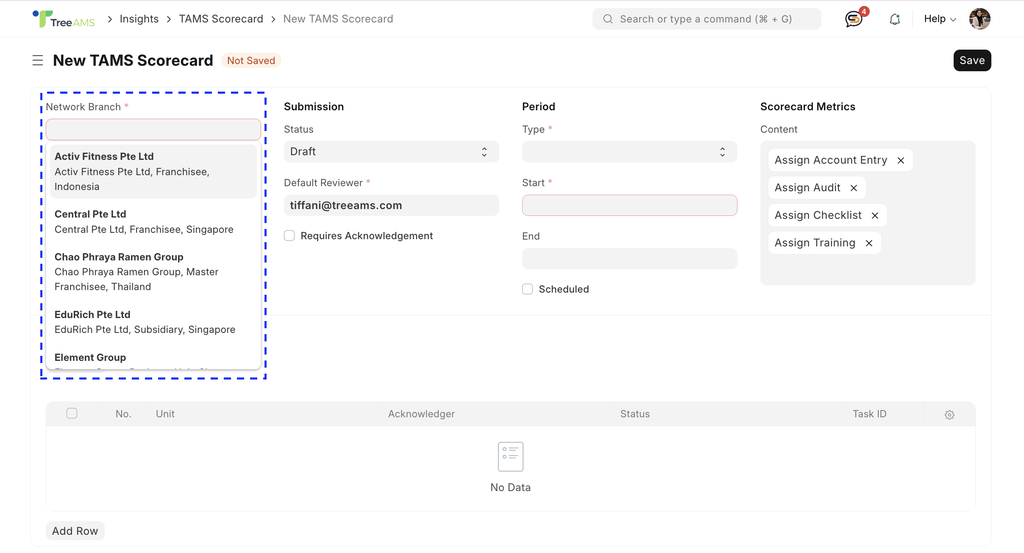
- Inside the Scorecard Setup, the first thing to do is to Select the Network of the branch or the outlets for the scorecard.
- Once the Network has been selected, click Get Units to show the direct units within the Network.
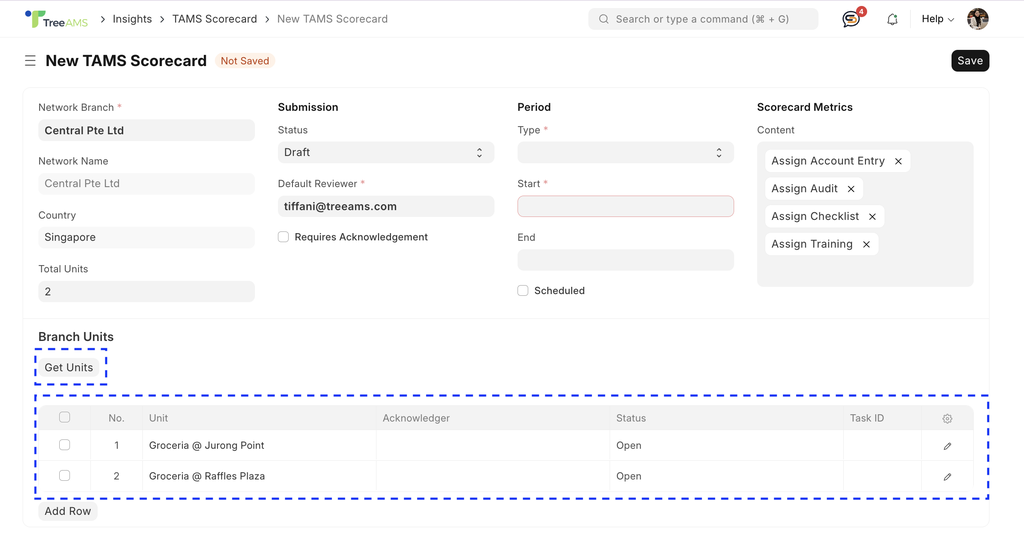
Then, set up the Submission settings.
a. You will need to assign a Default Reviewer for this Scorecard. This person will be responsible for reviewing the Scorecard metrics and providing recommendations for the outlets on the scorecard.
b. If you want outlets to formally acknowledge the Scorecard for accountability purposes, tick the Requires Acknowledgement checkbox and assign a default acknowledger. This person will be responsible for acknowledging the Scorecard across all listed units. To allow the acknowledger to add their own comments, tick Comment Required.
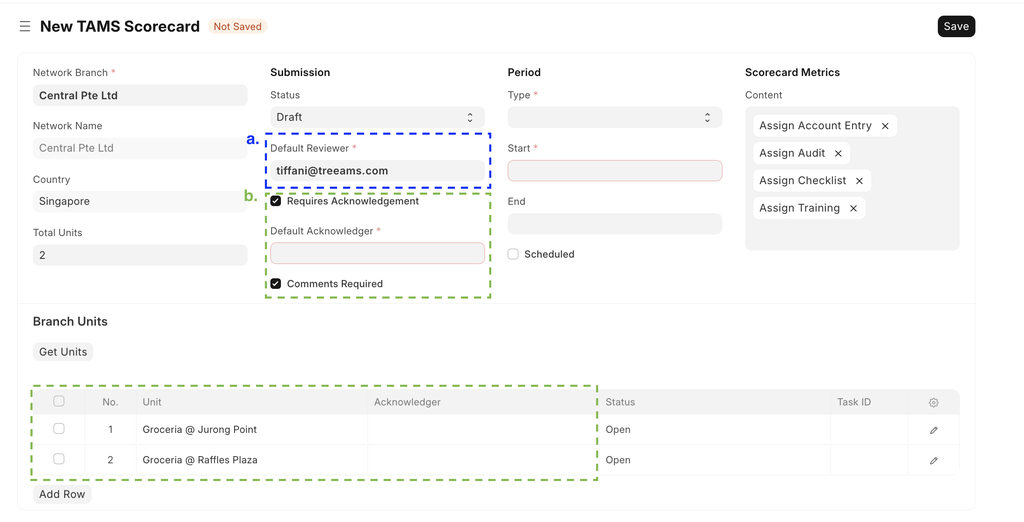
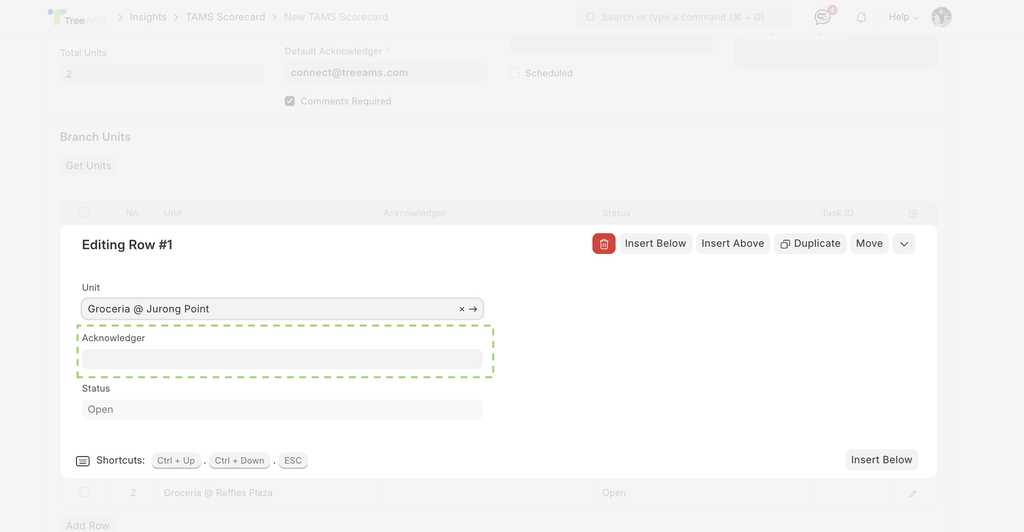
Note: The default acknowledger is applied to all units. If different people are responsible for different outlets, you'll need to assign them individually by clicking on each unit in the table (See image below!)
- Now, to set up the Scorecard Period. Please select the Report Type. You can choose to see the performance in Monthly, Quarterly, Half-Year or Annual.
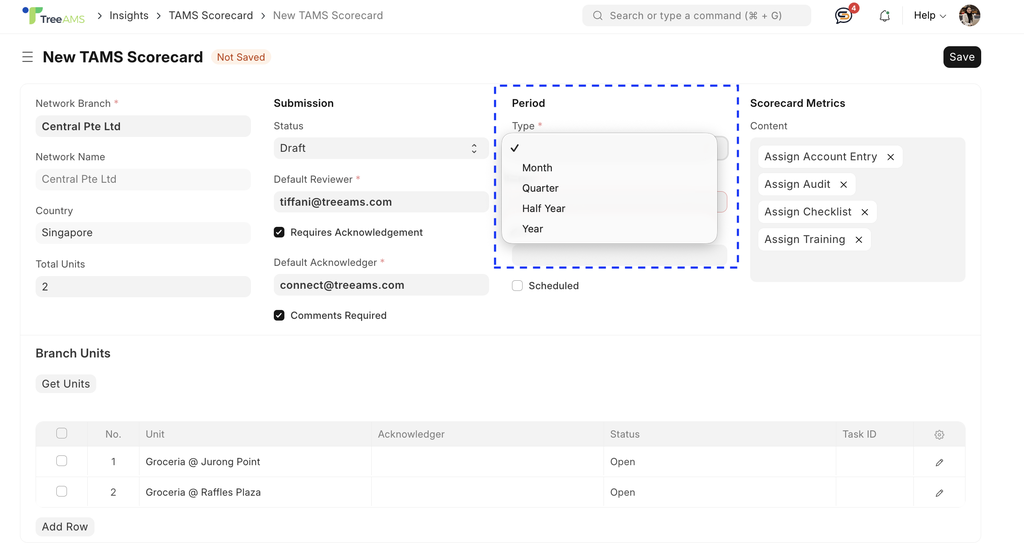
Set the Start and End Date for the report period you want to review. If you prefer to have the Scorecard generated automatically on a recurring basis, you can enable the scheduler instead.
If you have previously set up the Report Type to be:
Monthly — then it will start on the 1st of the following month, covering the previous full month.
Quarterly — then it will start on the 1st of the following quarter, covering the previous full quarter.
Half-year — then it will start on the 1st of the following half-year period, covering the previous full half-year. January to June is the first half, July to December is the second.
Year — then it will start on the 1st of the following year, covering the previous full year.
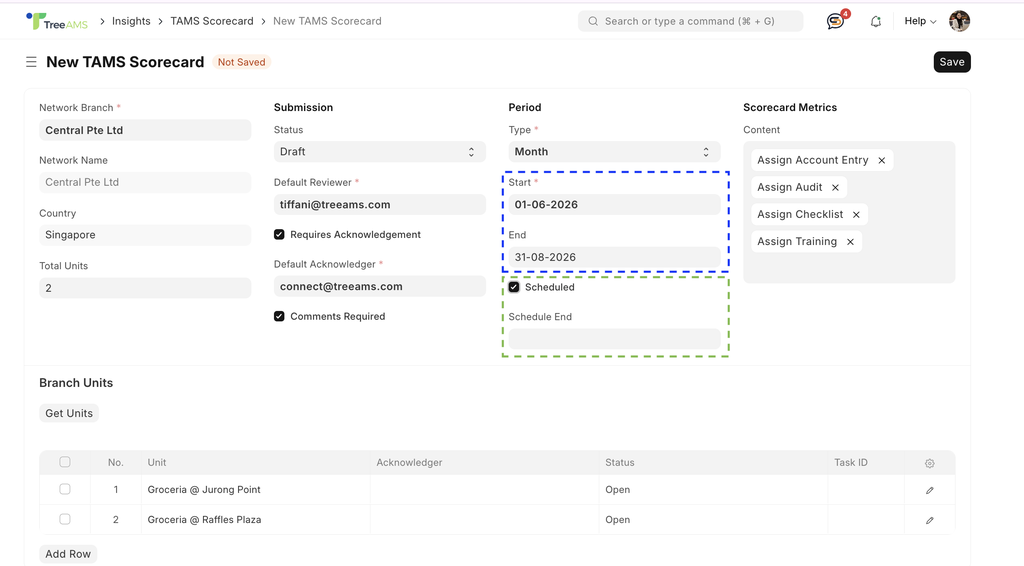
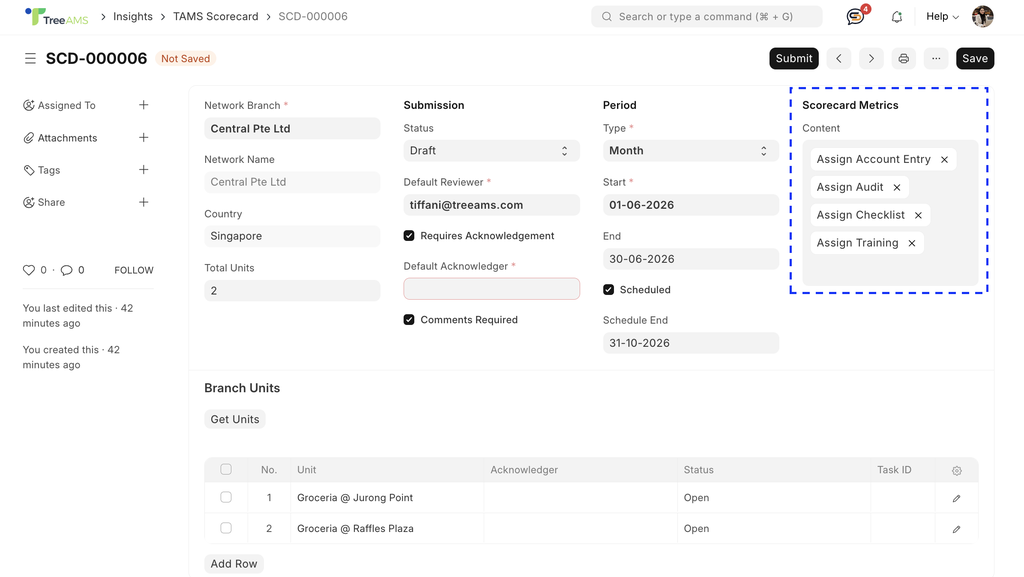
- Once the Period has been set up, you can customize the Content that you want to see on the Scorecard.
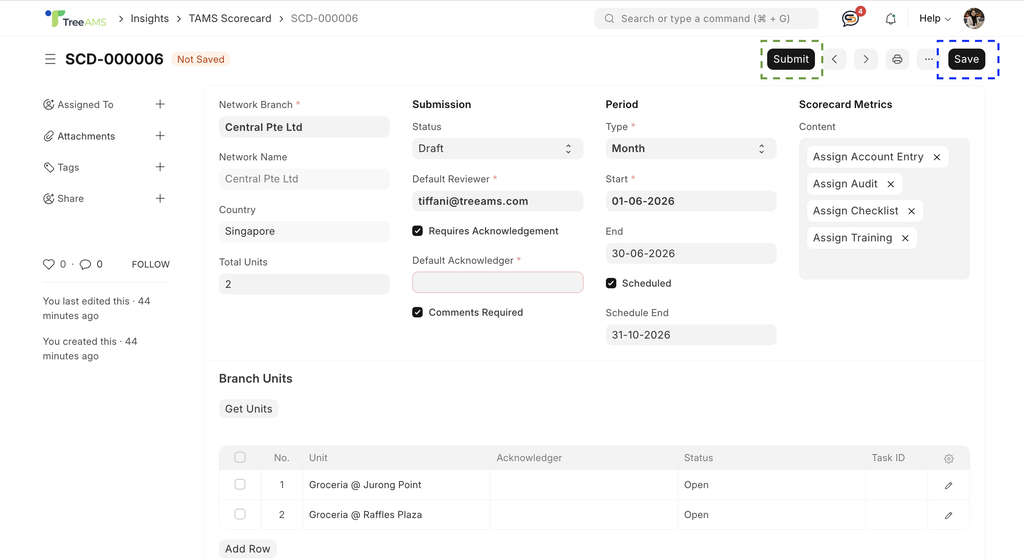
- Click Save to save your scorecard setup. Please note that this doesn’t mean the scorecard will be published yet. To publish the Scorecard you will need to click on the Submit button.
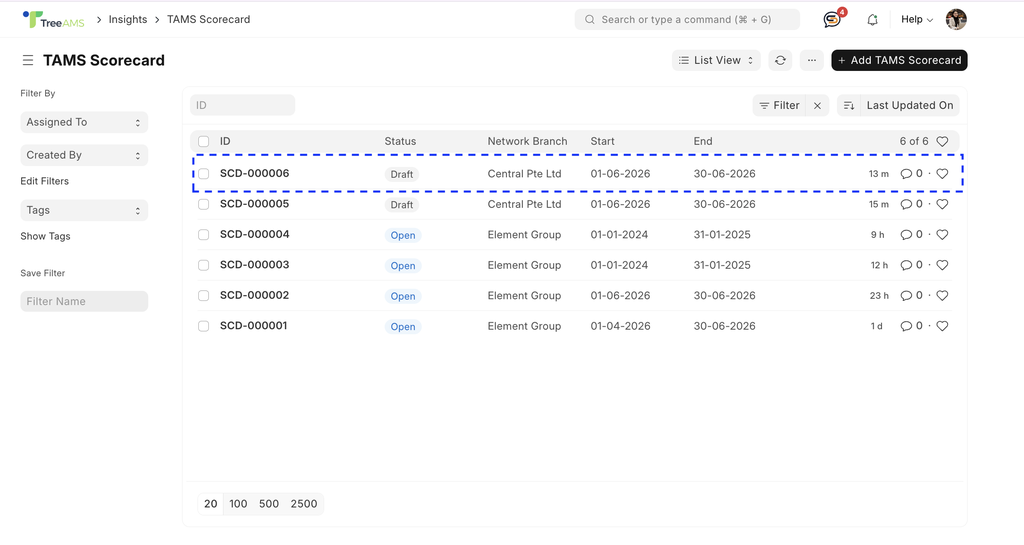
Once that’s done, you will be able to see the status of your scorecard on the previous page.
a. Draft: the scorecard has been set-up but hasn’t been submitted yet. b. Open: the scorecard has been submitted but hasn’t been reviewed or acknowledged yet. c. Completed: the scorecard has been reviewed and acknowledged. d. Cancel: the submitted scorecard has been cancelled.
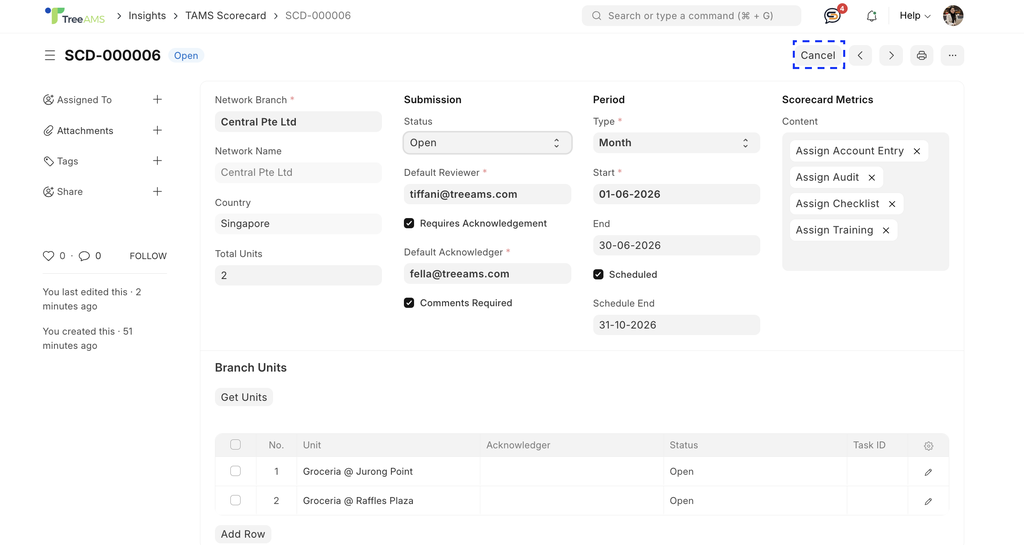
Note: To cancel a submitted scorecard, you can click Cancel on the top right corner here.
If you need assistance, please email us at
connect@treeams.com
.
We are happy to help! 👋😊