Posting & Managing Announcements
This section covers:
Posting Announcements
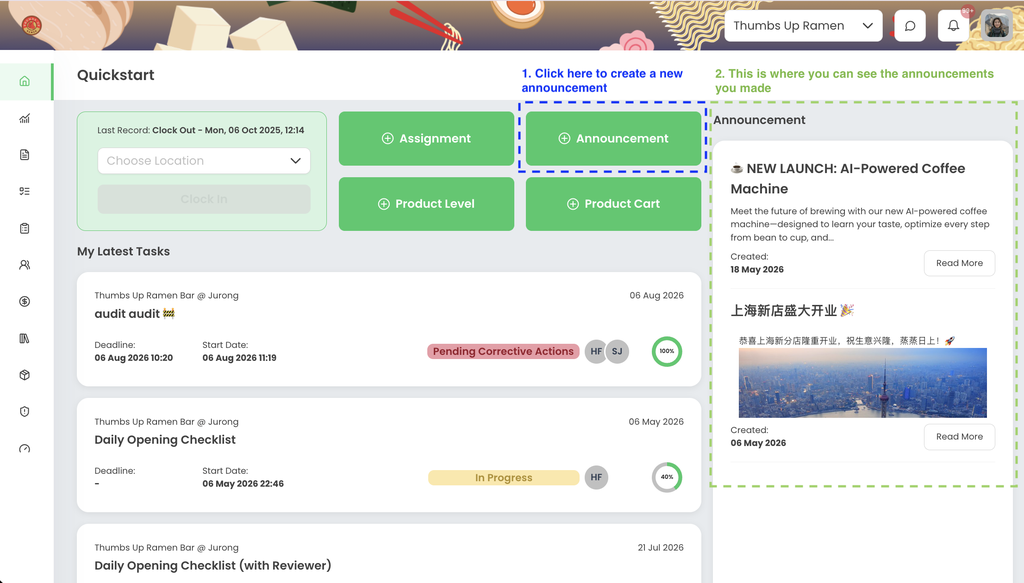
Log in to your TreeAMS account and click Announcement on your Quickstart to create a new announcement.
On the right hand side tab is where you will see the existing announcements that you’ve made.
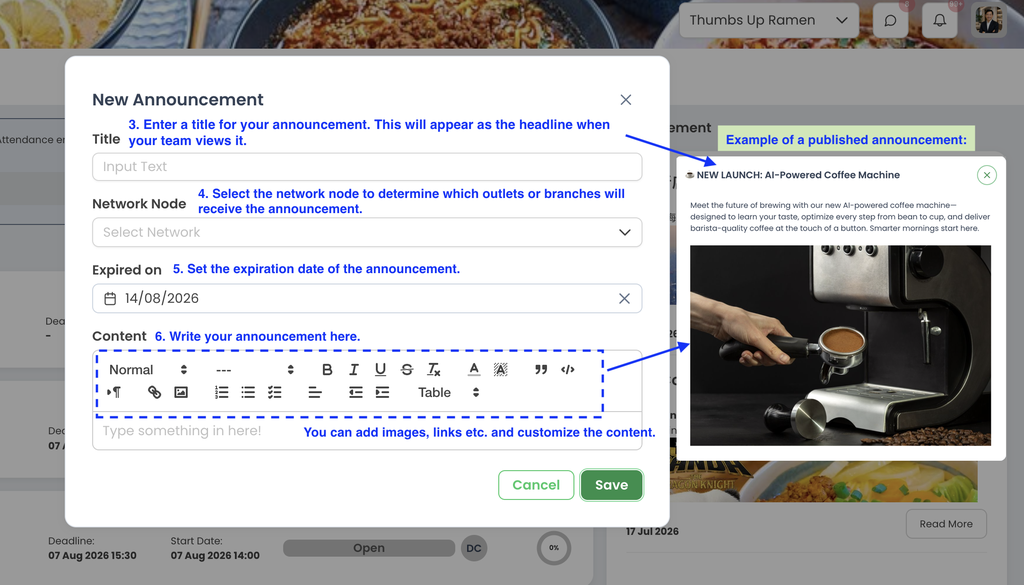
Once the Announcement is clicked, the setup page will pop-up. where you will need to fill in the title or the headline of the announcement.
Select the Network Node to determine which outlets or branches will receive the announcement. If you want it sent company-wide, select the network at business level. If you select a unit, the announcement will only be available to that specific unit.
Set an expiration date to control how long the announcement stays visible.
Use the Content field to write your announcement. You can add images and format the text to suit your message.
Managing Announcements
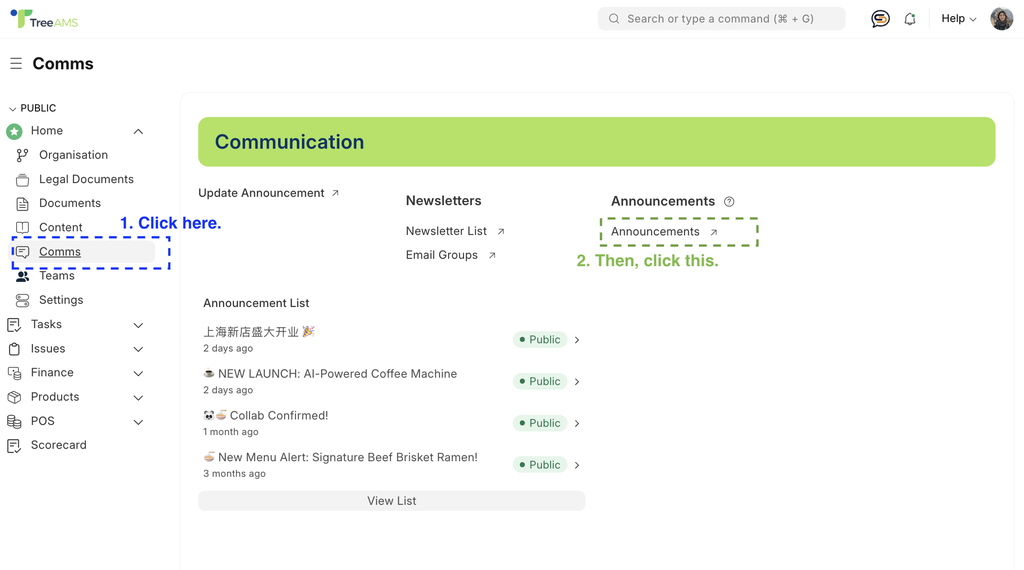
To manage your existing announcements, switch to Desk. Learn how you can switch to Desk here!
Go to Comms from the left menu, then click Announcements.
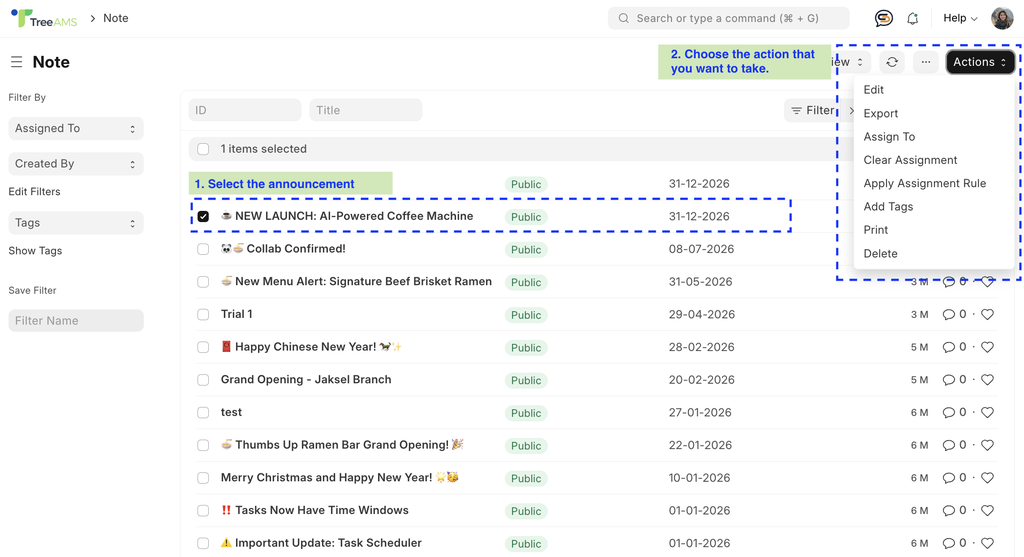
- This page shows all your existing announcements including its status and expiration date.
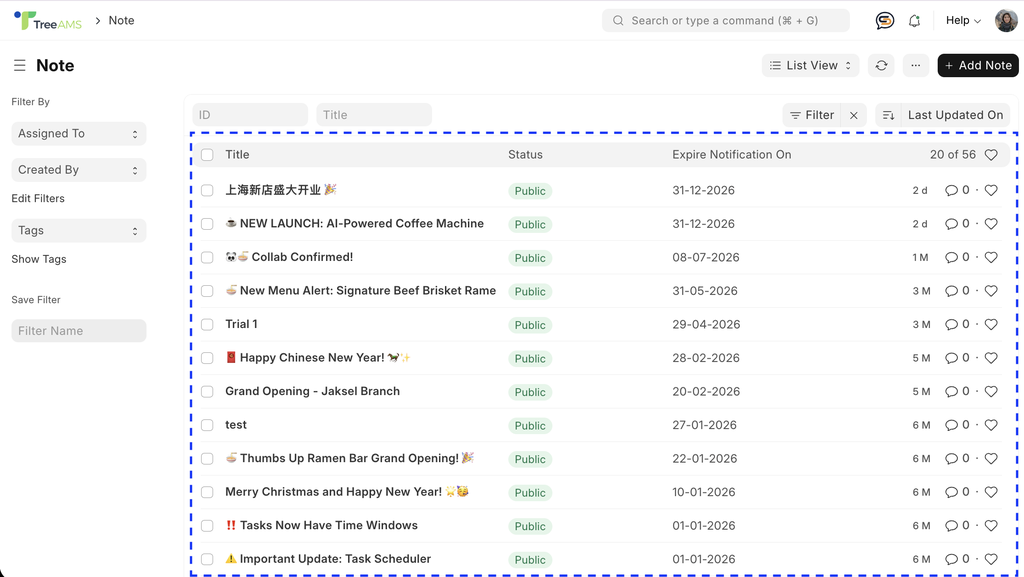
- If you want to delete any announcements, simply select or tick the chosen announcement then click on the Actions button on the top right to make the action.
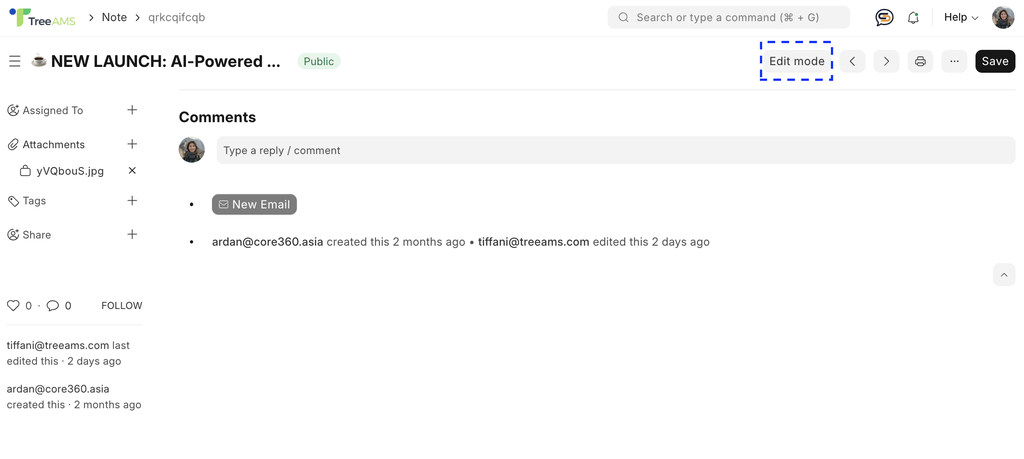
- To make any changes on the announcement content, simply click on the announcement that you want to make changes to then click Edit Mode.
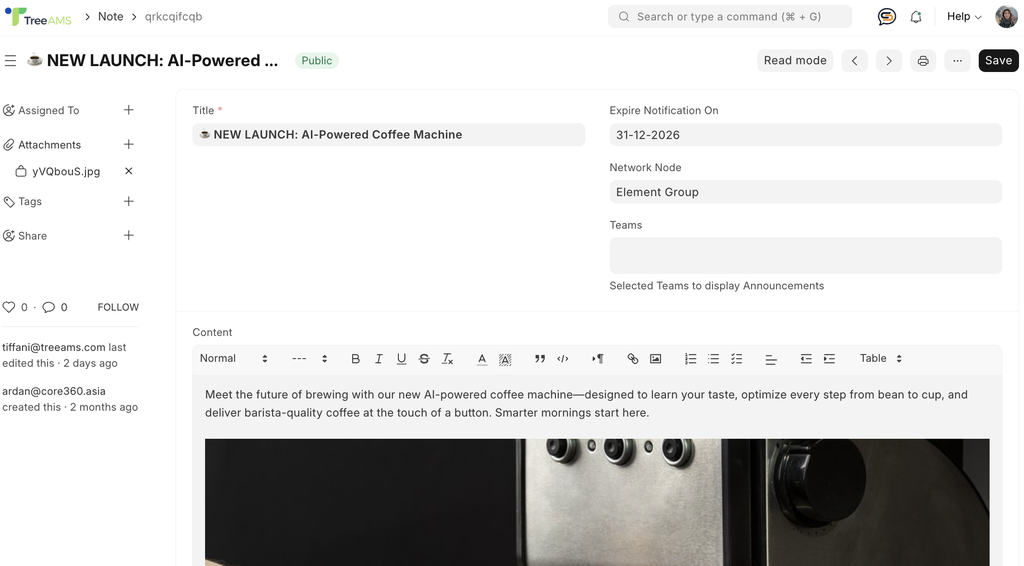
- This will take you to the Announcement Edit Page, where you will be able to make changes, such as content change or expiry date, to any existing announcements.
If you need assistance, please email us at
connect@treeams.com
.
We are happy to help! 👋😊